I will go through some ways to customize Vim; this will be a long post. You can use below table of contents below to navigate between topics.
Installing
MacOS
Installing through brew, make sure python points to python3 to compile Vim with python3.
 alias python=python3
 brew install vim

 # Add these in your ~/.bashrc or ~/.zshrc
 alias vim='/usr/local/bin/vi'
 alias vi='/usr/local/bin/vi'
You can also set export EDITOR='vi' in your zshrc/bashrc.
Windows
Use chocolatey to install vim.
choco install vim
Linux
For Debian based Linux OS, use apt
sudo apt install vim
For Redhat based Linux OS, use yum
sudo yum install vim
Default commands
Open
From the terminal, you can use Vim filename or just Vim. Once inside Vim, you can use command mode (:) to enter the below commands
| Command | Action |
|---|---|
| :e filename | open file in current buffer |
| :view filename | open file in current buffer read-only |
| :enew | open new buffer in current window |
| :new | open new buffer in horizontal split |
| :vnew | open new buffer in vertical split |
| :tabe | open new buffer in new tab |
Navigate
You can use the below commands in Normal mode to navigate the file buffer quickly. Every key is a command in Normal mode.
| Command | Action |
|---|---|
| h,j,k,l | Move left, down, up, right |
| 0 or ^ | Move to start of line |
| $ | Move to the end of line |
| gg | Go to start of the buffer |
| G | Go to end of the buffer |
| C-u | To go up half of the buffer |
| C-d | To go down half of the buffer |
| C-f | To go forward half of the buffer |
| C-b | To go backward half of buffer |
| C-o | To go backward in jumps |
| C-i | To go forward in jumps |
| `` | To go back to the last position |
Insert, undo & redo
You can come to insert mode from normal mode using the below commands.
| Command | Action |
|---|---|
| i | Insert at cursor |
| I | Insert at start of current line |
| a | Append after cursor |
| A | Append at the end of current line |
| o | Insert at after current line |
| O | Insert at before current line |
| u | undo last change |
| C-r | redo last change |
Save & quit
You can use the below commands in command mode to save the current buffer and exit.
| Command | Action |
|---|---|
| :q | quit |
| :q! | quit without save |
| :wq or :x | save and quit |
| :w | save but don’t quit |
Search
Below is how you can search in the current buffer
| Command | Action |
|---|---|
| /word | search word forward |
| /<word> | search exact word forward |
| :%s///n | To know the count of matches of last search word |
| n | search next match forward |
| N | search next match backward |
| * | search exact word under cursor forward |
| # | search exact word under cursor backward |
| g* or g# | search word under cursor |
| [I | search all lines containing word under cursor & display |
| :lv word *.txt | search word in all files ending with .txt |
| :lv word */.txt | search word in all files ending with .txt recursively |
| :lw | To view lvim results |
Cut, Copy & Paste
Below are some commands to cut, copy and paste
| Command | Action |
|---|---|
| dd | cut current line |
| yy | copy current line |
| dw | cut word |
| yy | copy word |
| cc | cut current line and go to insert mode |
| cw | cut word and go to insert mode |
| p | paste after cursor |
| P | paste before cursor |
| D | cut from the cursor to end of line |
| “ayy | copy current line to register a |
| “ap | paste contents of register a |
| :reg | To view contents of registers |
| ggdG | cut whole buffer content |
| ggyG | copy whole buffer content |
Replace
Below are some commands to replace text in a buffer.
| Command | Action |
|---|---|
| r | replace character under cursor |
| :%s/old/new/g | To replace old with new |
| :%s/old/new/gc | To replace old with new with confirmation |
Explanation
:1,$ s/old/new/g to replace all old with new in whole file.
1 – start of file
$ – end of file
s – substitute
old – old text
new – new text
g – globally
% refers to the current buffer so that you can use %s instead of 1,$.
Split
Below are some commands to split the current buffer
| Command | Action |
|---|---|
| :sp | split horizontally |
| :vsp | split vertically |
| vi -o file1 file2 | from shell, split file1 & file2 horizontal |
| vi -O file1 file2 | from shell, split file1 & file2 vertical |
| C-w + | Increase the size of window |
| C-w - | Decrease the size of window |
| C-w = | To equalize the size of each split window |
| C-w bar | To maximize in vertical split |
| C-w _ | To maximize in Horizontal split |
| C-w h | To move to the window left |
| C-w j | To move to the window below |
| C-w k | To move to the window above |
| C-w l | To move to the window right |
| C-w H | To move the current window to far-right |
| C-w J | To move the current window to far Down |
| C-w K | To move the current window to far Up |
| C-w L | To move the current window to far left |
| C-w T | To move the current window to a new tab |
Bookmarks
| Command | Action |
|---|---|
| ma | Bookmark current position as a |
| ‘a | Jump to the position marked as a |
Caps
| Command | Action |
|---|---|
| ma | Bookmark current position as a |
| ~ | To switch case of character under the cursor |
| g~~ | To change the case of the whole line |
| gUU | To make the entire line upper case |
| guu | To make the whole line lower case |
Global
| Command | Action |
|---|---|
| :g/pattern | List all the lines having pattern |
| :g/pattern/d | Delete all the lines having pattern |
| :v/pattern/d | Delete all the lines which does not have pattern |
| :g/pattern/y | Copy all the lines having pattern |
| :g/pattern/y A | Copy all the lines having pattern to register a |
| :g/start/,/end/d | Delete all blocks that matches start and end |
| :g/^/m0 | Reverse contents of file |
| :g/^pattern/s/old/new | Replace old to new only on the lines that match pattern |
Compare
| Command | Action |
|---|---|
| :windo diffthis | Compare buffers which are in vertical/horizontal split |
| do | to obtain the difference for the current line from diff file |
| dp | to put the difference for the current line to diff file |
Macros
| Command | Action |
|---|---|
| Is to start recording commands - use (a-z) to record | |
| @q | To execute the command in recording |
| n@q | To perform command n times |
| qqq | To remove recorded command |
Sorting
| Command | Action |
|---|---|
| :sort | To sort alphabetically |
| :sort! | To reverse the order |
| :sort n | To sort numbers |
| :sort u | To remove duplicates |
Visual
| Command | Action |
|---|---|
| v | Go to visual mode |
| V | Select current line in visual mode |
| y | copy selection |
| d | cut selection |
| : | Execute command in visual mode |
| C-v | Enter to column visual mode |
| C-q | Enter to column visual mode |
| I text Esc | In column mode, prefix text |
| x Esc | In column mode, remove text |
| r Esc | In column mode, replace text |
Indent
| Command | Action |
|---|---|
| :set ft=xml | set filetype as xml |
| == | indent as per ft |
| ggVG= | indent whole file as per ft |
Configuration
The configuration file is located at $HOME.
For Unix-based OS (macOS or Linux), it would be $HOME/.vimrc.
For Windows, it would be $HOME/_vimrc.
syntax on "for syntax

set title "show title in statusbar
set nocompatible "be iMproved, required
set noswapfile "disable creating swp file
set nowrap "dont wrap large lines
set ttyfast " faster redrawing

set noerrorbells "off audio error bells
set visualbell "off visual error bells
set t_vb= "off visual error bell"

set number "to show numbers
set shell=zsh "on shell, which shell to use
set showcmd "Show partial commands in the last line of the screen
set mouse=a "enable mouse support for Vim
set laststatus=2 "Always display the status line, even if only one window is displayed
set scrolloff=3 "lines of text around cursor
set cmdheight=1 "command bar height
set hidden "current buffer can be put into the background without closing
set nolazyredraw "don't redraw while executing macros
set showmatch "show matching braces
set noshowmode "don't show which mode disabled for PowerLine
set autoread "detect when a file is changed
set tm=500 "timeout length of key combination presses
set mat=2 " how many tenths of a second to blink

set autoindent "enable auto indent
set smartindent "enable smart indent

set incsearch "enable increment search
set ignorecase "enable ignore case
set smartcase "when using caps, ignore ic
set hlsearch "highlight search

" Tab control
set expandtab " tabs ftw
set smarttab " tab respects 'tabstop', 'shiftwidth', and 'softtabstop'
set tabstop=4 " the visible width of tabs
set softtabstop=4 " edit as if the tabs are 4 characters wide
set shiftwidth=4 " number of spaces to use for indent and unindent
set shiftround " round indent to a multiple of 'shiftwidth'

" Better command-line completion
set wildmode=longest,list
set wildmenu

" yanking will paste directly to the clipboard
set clipboard^=unnamed,unnamedplus
" Set the command window height to 2 lines, to avoid many cases of having to
" press <Enter> to continue"
set cmdheight=2
" set paste toggle
set pastetoggle=<leader>v
set term=screen-256color " required for tmux

" Folding
set foldmethod=syntax
set foldcolumn=1
set foldlevelstart=20
let g:vim_markdown_folding_disabled=1 " Markdown
let javaScript_fold=1                 " JavaScript
let perl_fold=1                       " Perl
let php_folding=1                     " PHP
let r_syntax_folding=1                " R
let ruby_fold=1                       " Ruby
let sh_fold_enabled=1                 " sh
let vimsyn_folding='af'               " Vim script
let xml_syntax_folding=1              " XML
autocmd BufRead,BufNewFile *.cql set filetype=cql
" Except Markdown
autocmd FileType mkd set sw=4
autocmd FileType mkd set sts=4

" To list special characters
set listchars=tab:▸\ ,eol:¬,extends:❯,precedes:❮,nbsp:+
set listchars+=trail:-
set showbreak=↪

set cursorline "show cursor line"

let mapleader="," " mapping leader
Anything following " is a comment. Please go through comments on what each setting does. Use :h <setting-name> to know more about that setting. You can copy and paste in your vimrc and change accordingly.
Plugin Manager
You can either choose Vundle or Vim Plug as your vim plugin manager.
Vundle
To install vundle
git clone https://github.com/VundleVim/Vundle.vim.git ~/.vim/bundle/Vundle.vim
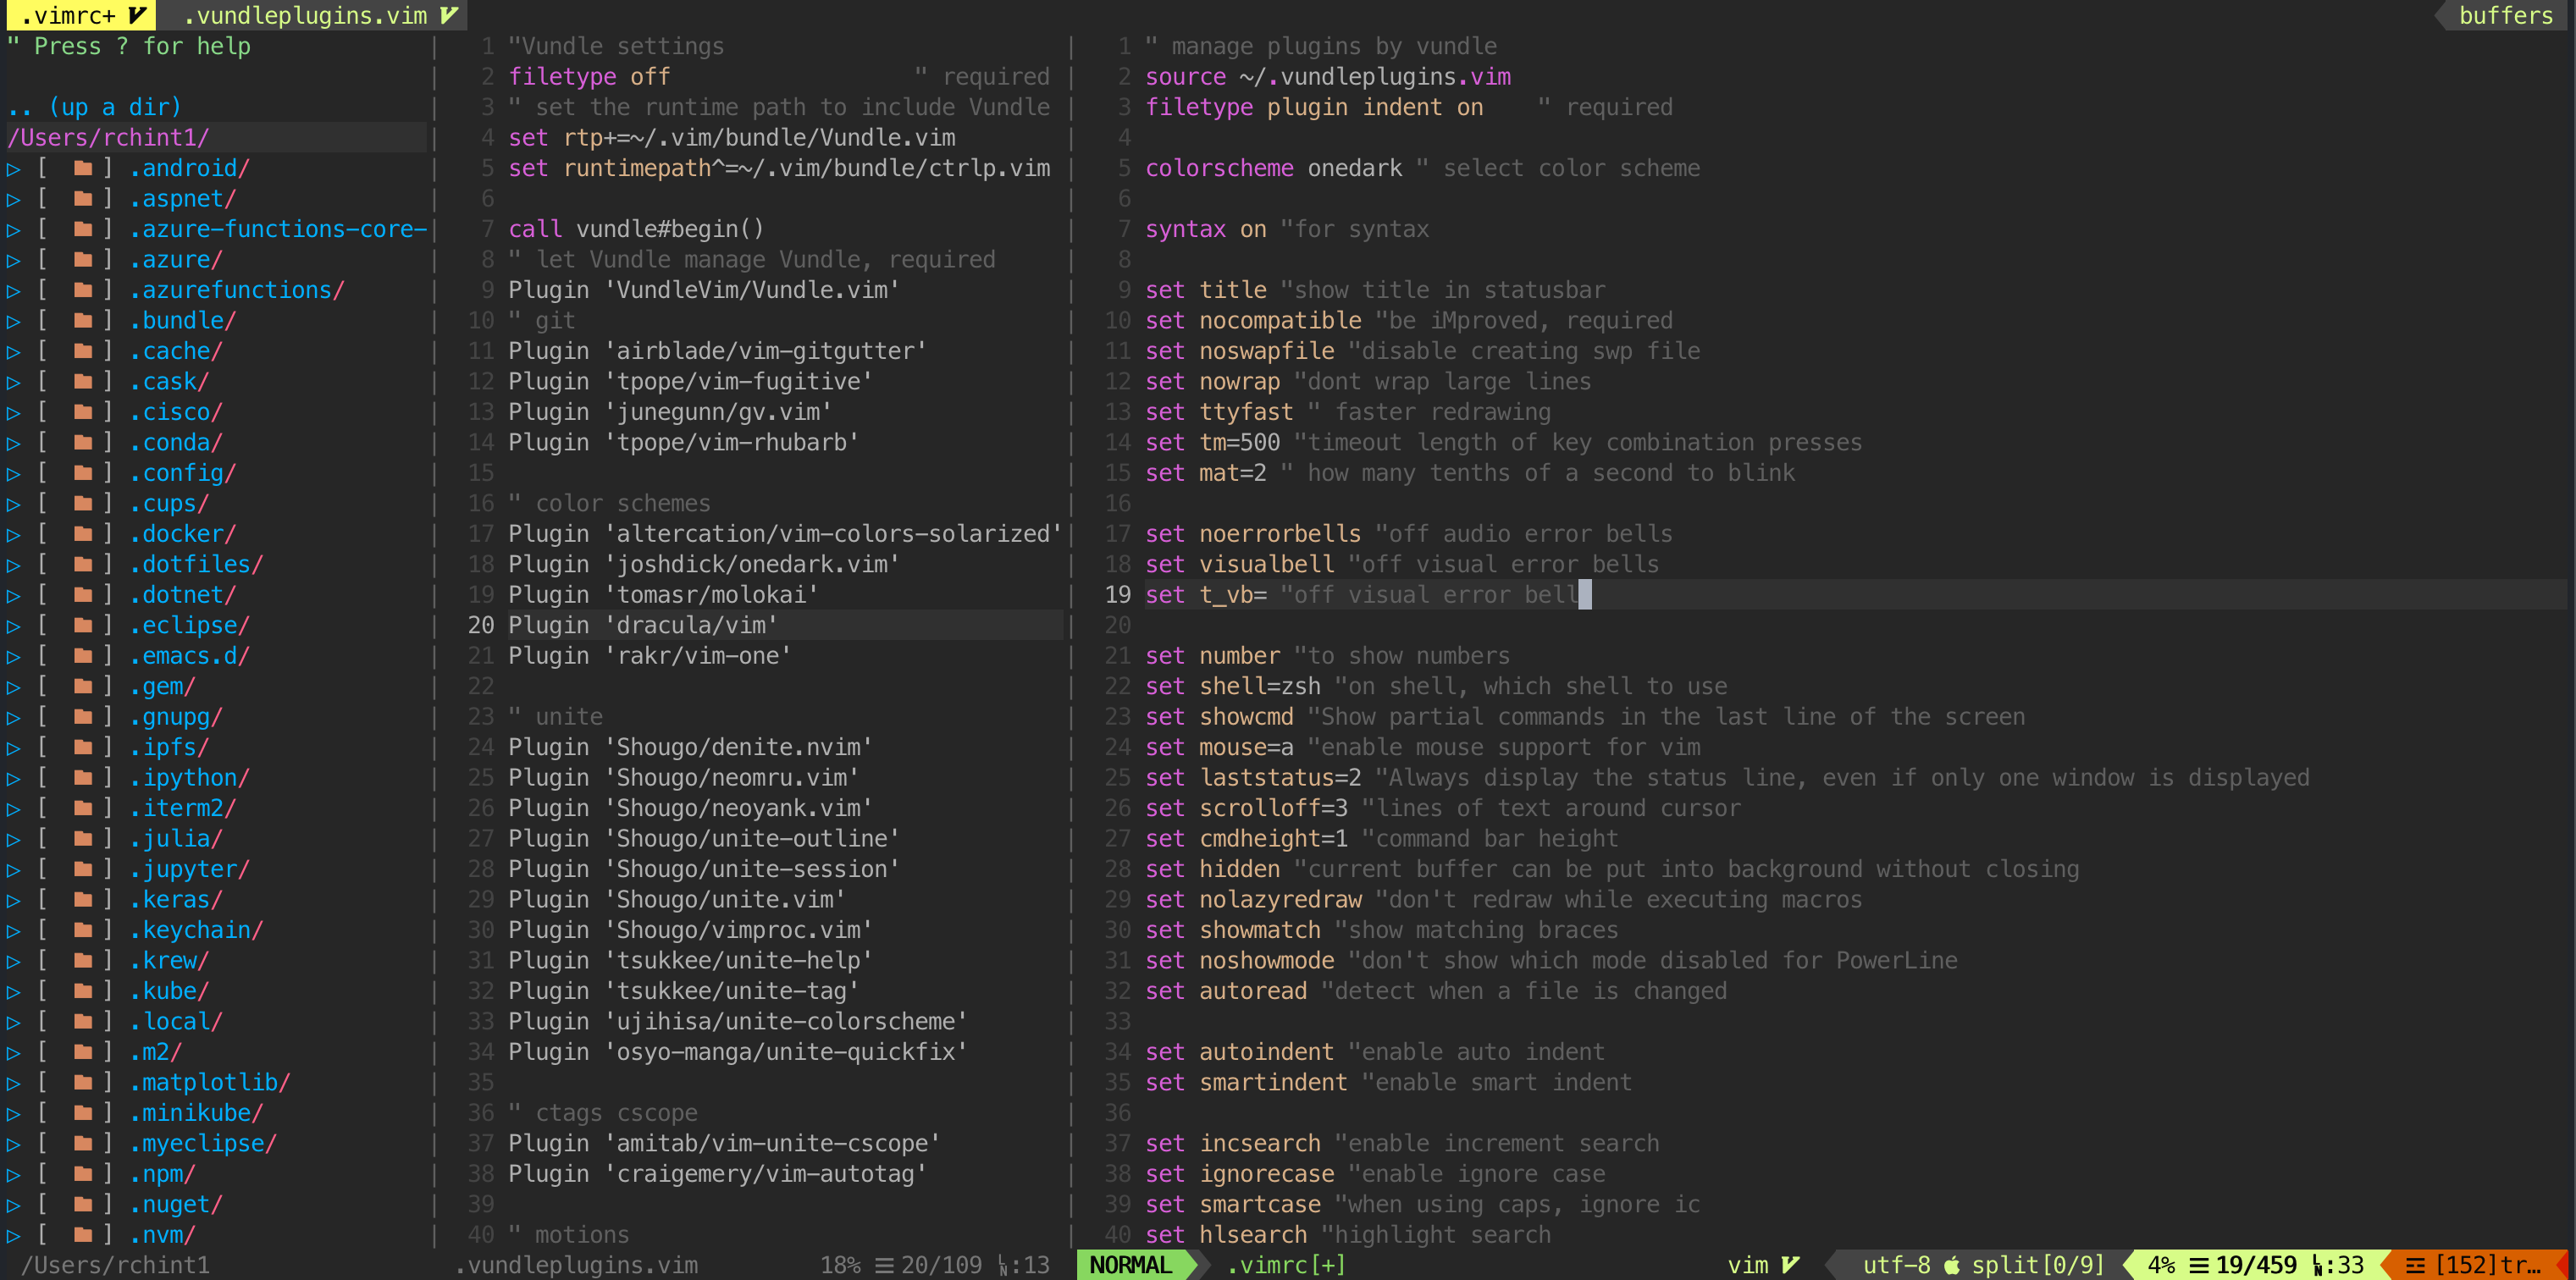
Now you can create file .vundleplugins.vim (You can name it anything you want). Add below content
"Vundle settings
filetype off                  " required
" set the runtime path to include Vundle and initialize
set rtp+=~/.vim/bundle/Vundle.vim

call vundle#begin()
" let Vundle manage Vundle, required
Plugin 'VundleVim/Vundle.vim'
...

call vundle#end()
Line 4 is where we are adding ~/.vim/bundle/Vundle.vim to runtimepath.
Line 9 - is where you will be adding plugins like Plugin <plugin-git-path>.
In Windows make sure that git is install and shell is set to cmd.exe with option /
set shellslash
" set the runtime path to include Vundle and initialize
set rtp+=~/vimfiles/bundle/Vundle.vim
" revert the shell
if has('win32')
   if empty($SHELL)
      set shell=cmd.exe shellcmdflag=/c shellredir=>%s\ 2>&1
      set shellxquote=( shellxescape&vim shellquote=
   endif
endif
...
Line 1 and 5 to 10 are needed for windows to work correctly. Make sure to source the above file in vimrc & reopen the Vim.
" manage plugins by vundle
source ~/.vundleplugins.vim
filetype plugin indent on    " required
For example, if you add plugins like below in the file
" color schemes
Plugin 'altercation/vim-colors-solarized'
Plugin 'joshdick/onedark.vim'
Plugin 'tomasr/molokai'
Plugin 'dracula/vim'
Plugin 'rakr/vim-one'
Then you to install, you need to do :PluginInstall in command mode Esc + :.
All plugins will be downloaded and kept in folder ~/.vim/bundle. To update the plugins, you can use :PluginUpdate. To remove, you can remove the plugin from ~/.vundleplugins.vim and then do :PluginClean to remove.
Vim-plug
To install vim plug
curl -fLo ~/.vim/autoload/plug.vim --create-dirs \
    https://raw.githubusercontent.com/junegunn/vim-plug/master/plug.vim
Create a file as ~/.vimplugins.vim and below content
" Specify a directory for plugins
" - For Neovim: stdpath('data') . '/plugged'
" - Avoid using standard Vim directory names like 'plugin'
call plug#begin('~/.vim/plugged')
" Make sure you use single quotes
...
" Initialize plugin system
call plug#end()
At Line 6, you will be adding plugins like Plug <plugin-git-path>.
For windows, you need to below at top to work.
filetype off

set rtp+=~/vimfiles/autoload/plug.vim
set shell=cmd.exe shellcmdflag=/c
For example, if you add plugins like below in the file
" color schemes
Plug 'altercation/vim-colors-solarized'
Plug 'joshdick/onedark.vim'
Plug 'tomasr/molokai'
Plug 'dracula/vim'
Plug 'rakr/vim-one'
Then you to install, you need to do :PlugInstall in command mode Esc + :.
To update the plugins, you can use :PlugUpdate. To remove, you can remove the plugin from ~/.vimplugins.vim and then do :PlugClean to remove.
Custom bindings
Basic
nnormap or nmap can be used to set key bindings in normal mode.
vnormap or vmap can be used to set keybindings in visual mode.
" CUSTOM KEY BINDINGS
let mapleader="," " mapping leader
"Map <C-L> (redraw screen) to also turn off search highlighting until the next search
nnoremap <leader>L :nohl<CR>
" custom command to show unprintable characters
nnoremap <leader>l :set list!<cr>
" toggle cursor line
nnoremap <leader>i :set cursorline!<cr>
" to write as root
noremap <leader>W :w !sudo tee % > /dev/null
" <Leader>q: Quit all, very useful in vimdiff
nnoremap <Leader>q :qa<cr>
" _ : Quick horizontal splits
nnoremap _ :new<cr>
" | : Quick vertical splits
nnoremap <bar> :vnew<cr>
" quickly edit new file
nnoremap <leader>e : enew<cr>
" buffer delete
nnoremap <leader>d :bd!<cr>
nnoremap <leader>D :%bd!<cr>
" compare split windows
nnoremap <leader>c :windo diffthis<cr>
nnoremap <leader>C :windo diffoff<cr>
" move to current directory
nnoremap sc :lcd %:p:h<cr>
" remove lines
nnoremap <leader>G :g//d<CR>
nnoremap <leader>V :v//d<CR>
nnoremap <leader>S :%s///g<CR>
" copy current relative file path
nnoremap <leader>cf :let @*=expand("%")<CR>
" lgrep
nnoremap <Leader>r :silent lgrep<Space>
nnoremap <Leader>R :silent lgrep <C-r><C-w><cr>
" to resize windows
nmap <leader>vs :vertical resize +10<cr>
nmap <leader>hs :resize +10<cr>
" switch between current and last buffer
nmap <space>. <c-^>
" quickly open quick fix
nmap <space>q : copen<cr>
nmap <space>Q : cclose<cr>
" when in visual mode, search for selected text
vnoremap // y/<C-R>"<CR>
" remove all trailing spaces
nnoremap <F5> :let _s=@/<Bar>:%s/\s\+$//e<Bar>:let @/=_s<Bar><CR>
Theme
You can download any theme like below
" color schemes
Plugin 'altercation/vim-colors-solarized'
Plugin 'joshdick/onedark.vim'
Plugin 'tomasr/molokai'
Plugin 'dracula/vim'
Plugin 'rakr/vim-one'
And these themes can be applied using like below
" theme
colorscheme onedark " select color scheme

" toggle background
function! BgToggleSol()
  if &background == "light"
    execute ":set background=dark"
  else
    execute ":set background=light"
  endif
endfunction
nnoremap <F2> :call BgToggleSol()<cr>
Note: If theme supports dark and light you can use above toggle function to toggle between dark and light.
The status bar of Vim can be customized using the airline plugin.
" airline
Plugin 'vim-airline/vim-airline'
Plugin 'vim-airline/vim-airline-themes'
Below are airline settings
" air-line settings
let g:airline_theme='wombat'
let g:airline#extensions#tabline#enabled = 1
let g:airline#extensions#tabline#left_sep = ' '
let g:airline#extensions#tabline#left_alt_sep = '|'
let g:table_mode_corner_corner="+"
let g:table_mode_header_fillchar="="
let g:airline_powerline_fonts = 1
if !exists('g:airline_symbols')
    let g:airline_symbols = {}
endif
Make sure you have correct powerline fonts installed. Make sure that in terminal/term, you are using the power line font.
For GUI vim, you can strip the menu bar and have custom font below.
" gui settings
if has("gui_running")
  "set guifont=Meslo\ LG\ S\ DZ\ Regular\ for\ Powerline:h14
  "set guifont=Droid\ Sans\ Mono\ for\ Powerline\ Plus\ Nerd\ File\ Types:h14
  set guifont=MesloLGSDZNerdFontComplete-Regular:h16
  set guioptions-=m  "remove menu bar
  set guioptions-=T  "remove toolbar
  set guioptions-=r  "remove right-hand scroll bar
  set guioptions-=L  "remove left-hand scroll bar
endif
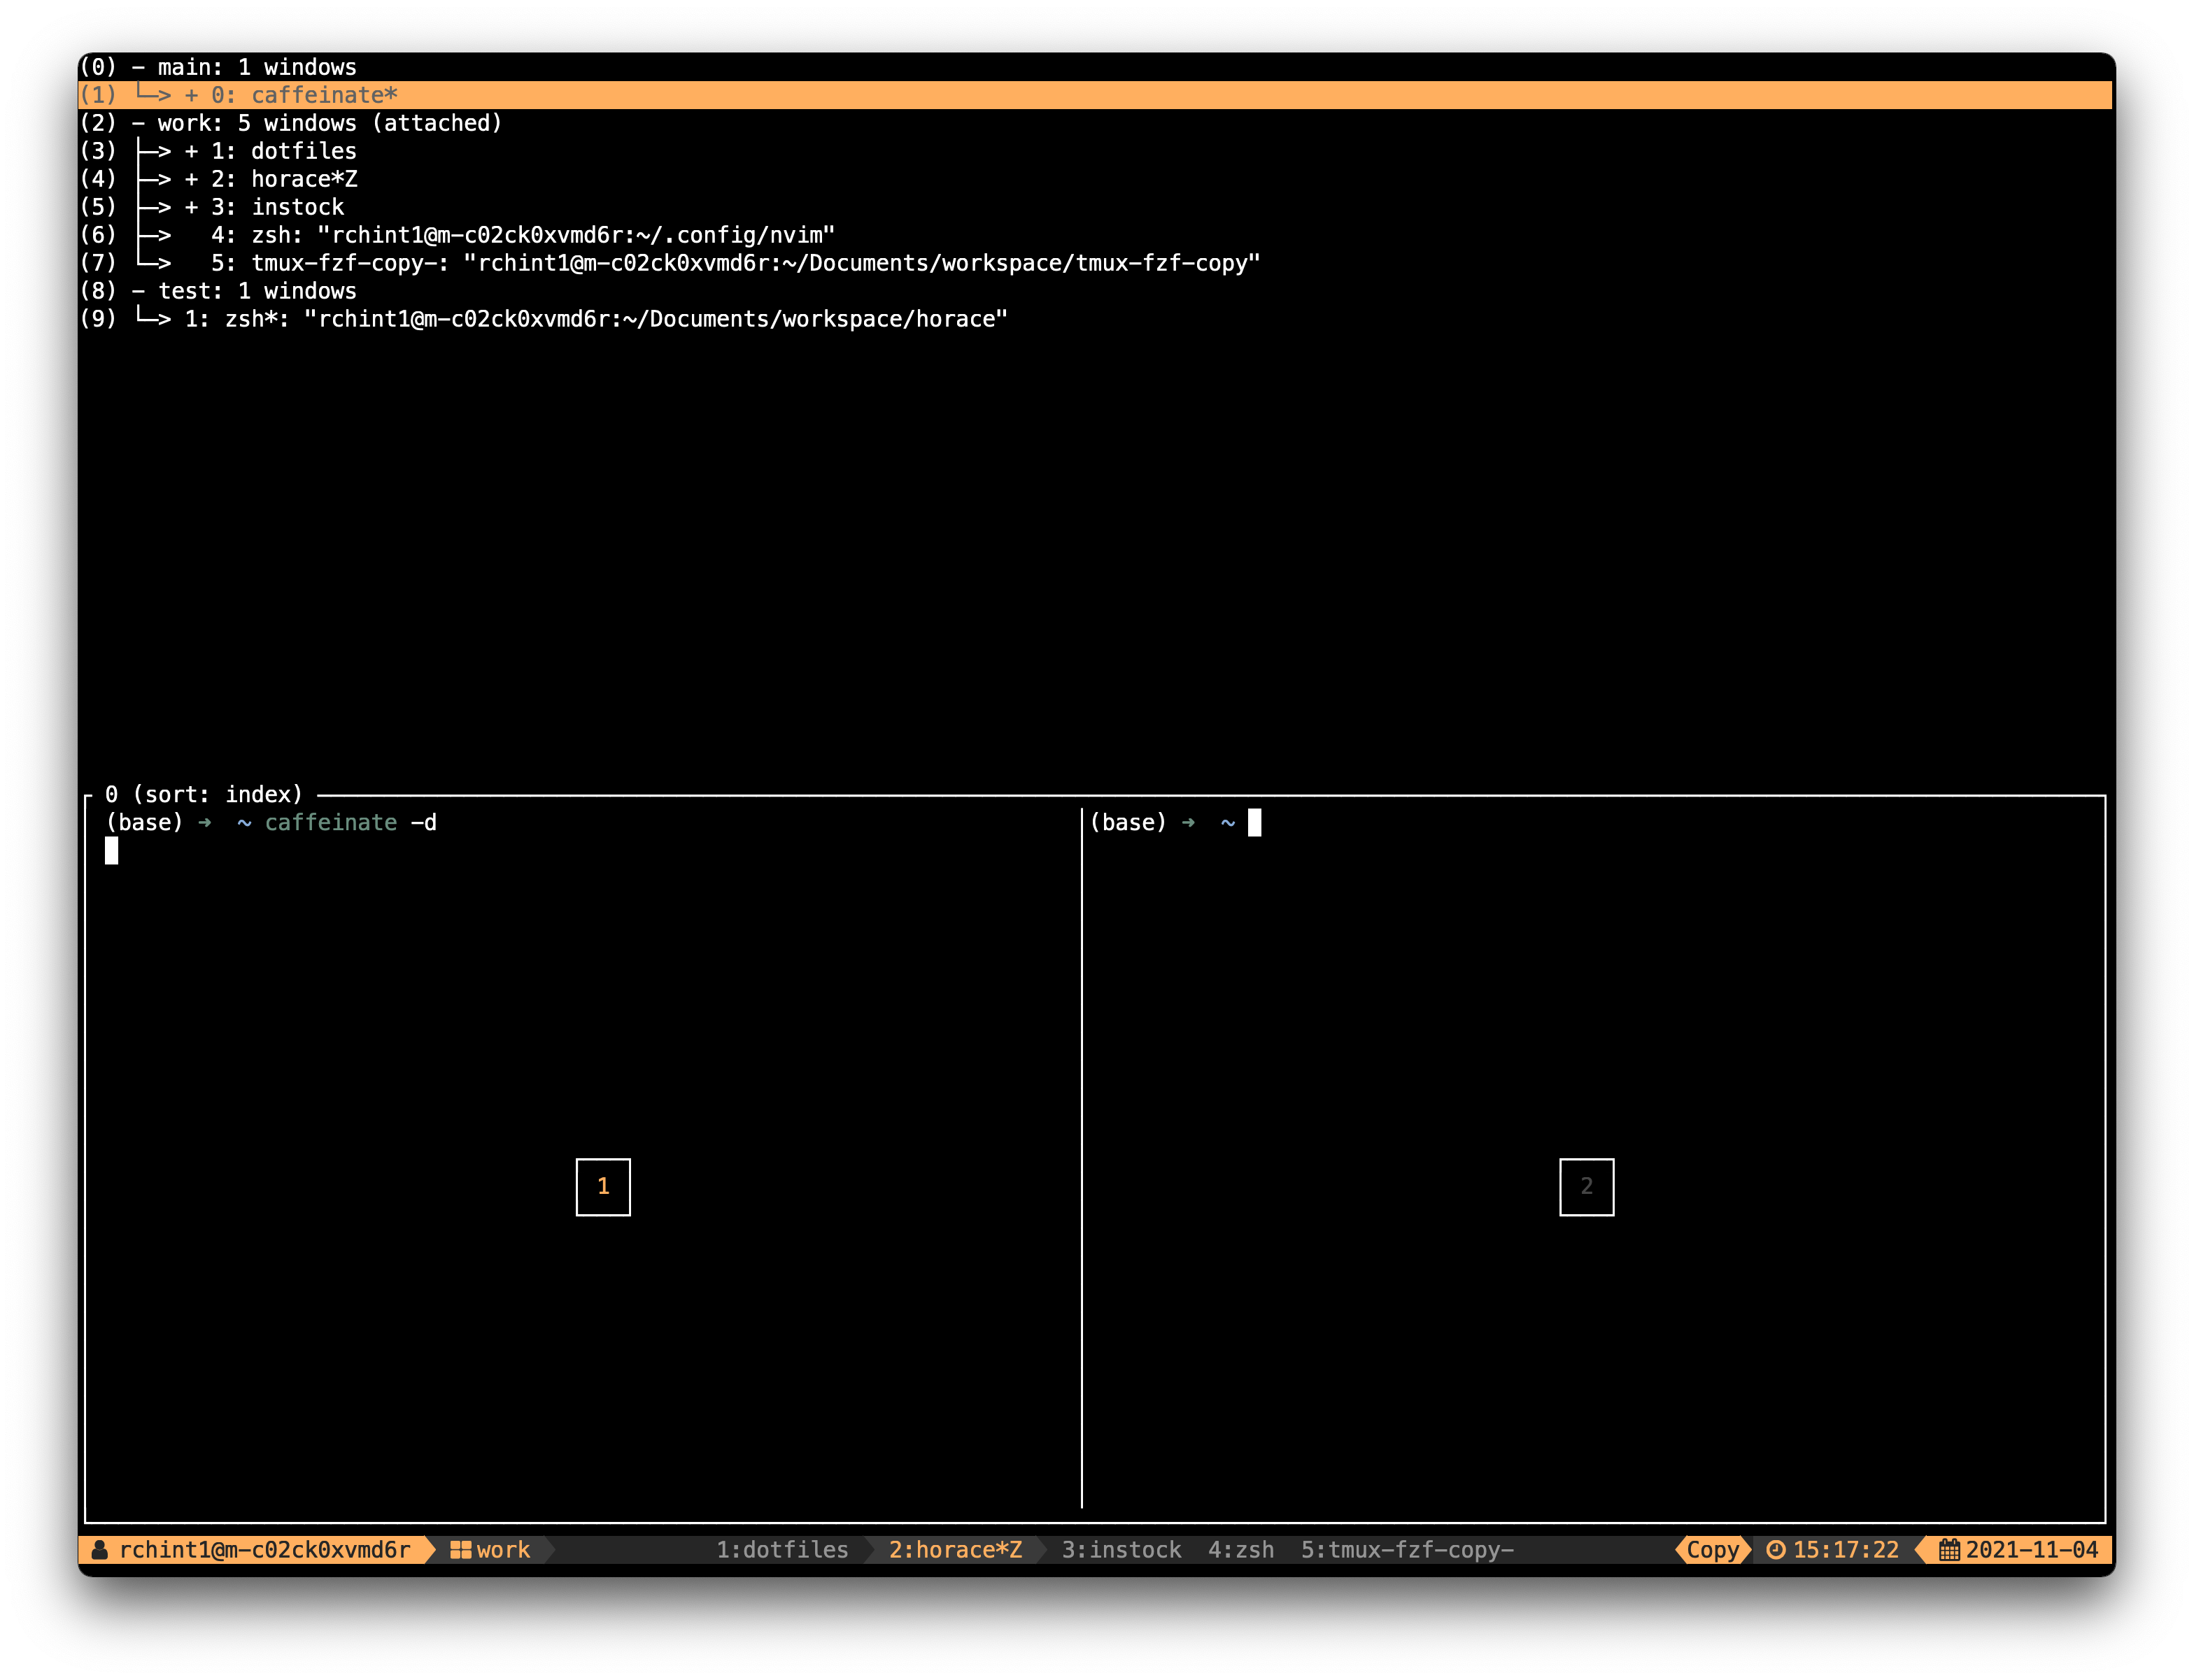
If everything is done correctly, you might get similar theme.

Fuzzy finder
Below plugins will give quick access to files, history, git history, and more.
" fuzzy finders
Plugin 'junegunn/fzf', { 'dir': '~/.fzf', 'do': './install --all' }
Plugin 'junegunn/fzf.vim'
Below are some custom bindings for fzf. Make sure that you installed fzf.
" FZF settings
" search for a word
nnoremap <space>a :Ag<cr>
nnoremap <space>A :Ag <C-r><C-w><cr>
" find lines in file
nnoremap <space>l :BLines<cr>
nnoremap <space>L :Lines <C-r><C-w><cr>
" Find tags
nnoremap <space>t :BTags<cr>
nnoremap <space>T :Tags <C-r><C-w><cr>
" Find files
nnoremap <space>f :FZF<cr>
nnoremap <C-p> :<C-u>FZF<CR>
nnoremap <space>F :FZF <C-r><C-w><cr>
" History
nnoremap <space>r :History<cr>
" get command history
nnoremap <space>d :History:<cr>
" show current buffer commits
nnoremap <space>c :BCommits<cr>
" Show git status
nnoremap <space>s :GFiles?<cr>
" get all key mappings
nnoremap <space>m :Maps<cr>
" get all buffers
nnoremap <space>b :Buffers<cr>
" get Windows
nnoremap <space>w :Windows<cr>
Fuzzy search will get results as you type, and you can use C-k or C-j to move up or down to select, and use Enter, C-x, C-v or C-t to open the selection in the current buffer, horizontal split, vertical split or in new tab.
By default, when you search for files in the current directory, you will not get preview of the file. You can add below command to get preview on the files, before opening them for edit.
" use ripgrep
if executable('rg')
  let $FZF_DEFAULT_COMMAND = 'rg --files --hidden --follow --glob "!.git/*"'
  set grepprg=rg\ --vimgrep\ --no-heading\ --smart-case
  command! -bang -nargs=* Find call fzf#vim#grep('rg --column --line-number --no-heading --fixed-strings --ignore-case --hidden --follow --glob "!.git/*" --color "always" '.shellescape(<q-args>).'| tr -d "\017"', 1, <bang>0)
endif
nnoremap <silent> <space>e :call Fzf_dev()<CR>
" Files + devicons
function! Fzf_dev()
  let l:fzf_files_options = '--preview "bat --theme="OneHalfDark" --style=numbers,changes --color always {2..-1} | head -'.&lines.'"'

  function! s:files()
    let l:files = split(system($FZF_DEFAULT_COMMAND), '\n')
    return s:prepend_icon(l:files)
  endfunction

  function! s:prepend_icon(candidates)
    let l:result = []
    for l:candidate in a:candidates
      let l:filename = fnamemodify(l:candidate, ':p:t')
      let l:icon = WebDevIconsGetFileTypeSymbol(l:filename, isdirectory(l:filename))
      call add(l:result, printf('%s %s', l:icon, l:candidate))
    endfor

    return l:result
  endfunction

  function! s:edit_file(item)
    let l:pos = stridx(a:item, ' ')
    let l:file_path = a:item[pos+1:-1]
    execute 'silent e' l:file_path
  endfunction

  call fzf#run({
        \ 'source': <sid>files(),
        \ 'sink':   function('s:edit_file'),
        \ 'options': '-m ' . l:fzf_files_options,
        \ 'down':    '50%' })
endfunction
Search
The above fuzzy finder might not always be suitable for search; you can use Grepper plugin.
Plugin 'mhinz/vim-grepper'
Below are some custom bindings for Grepper, the search results will be kept in quickfix
let g:grepper       = {}
let g:grepper.tools = ['rg', 'ag', 'grep', 'git']
set grepprg=rg\ --vimgrep\ --no-heading\ --smart-case
set grepformat=$f:$l:%c:%m
" Search for the current word
nnoremap <Leader>* :Grepper -cword -noprompt<CR>
nnoremap <space>g : Grepper <cr>
nnoremap <space>G :Grepper -tool rg -buffers<cr>
" Search for the current selection
nmap gs <plug>(GrepperOperator)
xmap gs <plug>(GrepperOperator)
cabbrev grep GrepperGrep
function! SetupCommandAlias(input, output)
  exec 'cabbrev <expr> '.a:input
        \ .' ((getcmdtype() is# ":" && getcmdline() is# "'.a:input.'")'
        \ .'? ("'.a:output.'") : ("'.a:input.'"))'
endfunction
call SetupCommandAlias("grep", "GrepperGrep")
Now ,* will search for the word under the cursor, <space> g will prompt for the word to search. You can use TAB to cycle through different grep tools.
Nerd Tree
To get folder tree on left side, you can install scrooloose/nerdtree. If you want to know the git status of file you can also install Xuyuanp/nerdtree-git-plugin
" file and folder
Plugin 'scrooloose/nerdtree'
Plugin 'Xuyuanp/nerdtree-git-plugin'
Below are specific to nerd tree. ,t will toggle the tree and ,T will expand the tree folder where the current buffer is located.
"NERTtree mappings
" Toggle NERDTree
nmap <silent> <leader>t :NERDTreeToggle<cr>
" expand to the path of the file in the current buffer
nmap <silent> <leader>T :NERDTreeFind<cr>
let NERDTreeShowHidden=1
let NERDTreeDirArrowExpandable = '▷'
let NERDTreeDirArrowCollapsible = '▼'
let NERDTreeShowExecutableFlag = 0
Git
Below plugins gives all the necessary options to deal with git. Please refer fugitive for documentation.
" git
Plugin 'tpope/vim-fugitive'
" A git commit browser.
Plugin 'junegunn/gv.vim'
" shows what line got changed, move between hunks
Plugin 'airblade/vim-gitgutter'
" Enables :GBrowse from fugitive.vim to open GitHub URLs.
Plugin 'tpope/vim-rhubarb'
Below are some mappings that can help to access git inside vim quickly.
"futitive git
let g:fugitive_github_domains      = ['https://<enterprise-git>']
let g:github_enterprise_urls       = ['https://<enterprise-git']
nnoremap <leader>gl :Git log -10 -- %<CR>
nnoremap <leader>gs :Git<CR>
nnoremap <leader>gb :Git blame<CR>
nnoremap <leader>gB :GV<CR>
nnoremap <leader>gd :Gvdiffsplit<CR>

"Ggrep custom command
command -nargs=+ Ggr execute 'silent Ggrep!' <q-args> | cw | redraw!
Coding
Snippets
Below plugins gives the option to get code snippets quickly.
" Snippet engine
Plugin 'SirVer/ultisnips'
" Provides some default snippets
Plugin 'honza/vim-snippets'
ultisnips is the snippet engine. vim-snippets has common snippets of most popular languages. You can also create your snippet. Please check screencasts to know how to create snippets.
" UltiSnips Trigger configuration.
let g:ycm_key_list_select_completion=['<C-n>', '<Down>']
let g:ycm_key_list_previous_completion=['<C-p>', '<Up>']

let g:UltiSnipsExpandTrigger="<Tab>"
let g:UltiSnipsJumpForwardTrigger="<Tab>"
let g:UltiSnipsJumpBackwardTrigger="<S-Tab>"
"
"If you want :UltiSnipsEdit to split your window.
let g:UltiSnipsEditSplit="vertical"
let g:UltiSnipsSnippetDirectories = ['~/.vim/UltiSnips', 'UltiSnips']
Auto Completion
Vim by default has auto completion features.
| Key Combination | Completion |
|---|---|
| C-x C-n or C-x C-p | Word |
| C-x C-l | Sentence |
| C-x C-f | File |
| C-x C-k | Dictionary |
Note: For dictionary completion to work - set dictionary+=/usr/share/dict/words
In addition to above you can use below plugins to do more auto completion.
" Gives mappings to surround text with special chars
Plugin 'tpope/vim-surround'
" Provides automatic closing brackets
Plugin 'Raimondi/delimitMate'
" Supertab is a vim plugin which allows you to use <Tab> for all your insert
" completion needs
Plugin 'ervandew/supertab'
" commenting
Plugin 'scrooloose/nerdcommenter'
- delimitMate provides auto closing of brackets and quotes.
- supertab gives auto completion on tab in insert mode.
- nerdcommenter provides quick commenting.
- For vim-surround, you can use below settings to quickly surround text with quotes or any special characters.
  "Souround settings
  " ,# Surround a word with #{ruby interpolation}
  map ,# ysiw#
  vmap ,# c#{<C-R>"}<ESC>

  " ," Surround a word with "quotes"
  map ," ysiw"
  vmap ," c"<C-R>""<ESC>

  " ,' Surround a word with 'single quotes'
  map ,' ysiw'
  vmap ,' c'<C-R>"'<ESC>

  " ,) or ,( Surround a word with (parens)
  " The difference is in whether a space is put in
  map ,( ysiw(
  map ,) ysiw)
  vmap ,( c( <C-R>" )<ESC>
  vmap ,) c(<C-R>")<ESC>

  " ,[ Surround a word with [brackets]
  map ,] ysiw]
  map ,[ ysiw[
  vmap ,[ c[ <C-R>" ]<ESC>
  vmap ,] c[<C-R>"]<ESC>

  " ,{ Surround a word with {braces}
  map ,} ysiw}
  map ,{ ysiw{
  vmap ,} c{ <C-R>" }<ESC>
  vmap ,{ c{<C-R>"}<ESC>

  map ,` ysiw`
Quick Navigation
Below plugins gives the option to navigate buffers/files/tabs quickly.
" Gives mappings with ] [
Plugin 'tpope/vim-unimpaired'
" Gives options C-a, C-e in insert mode
Plugin 'tpope/vim-rsi'
- vim-unimpaired gives a bunch of mappings to move around buffers/files/tabs.
- vim-rsi gives the option to use ctrl keys to navigate in insert mode. Use emacs bindings to move around in insert mode.
" vim-rsi
" disable meta keys for RSI
let g:rsi_no_meta = 1
Syntax & tagging
Below plugins are helpful does syntax checking. Tagging allows to quickly navigate code, for example, to find references of all methods calling this method.
" Gives option to repeat above
Plugin 'tpope/vim-repeat'
" language packs for Vim
Plugin 'sheerun/vim-polyglot'
" ctags cscope
Plugin 'craigemery/vim-autotag'
" React
Plugin 'mxw/vim-jsx'
" Tern is a stand-alone code-analysis engine for JavaScript
Plugin 'ternjs/tern_for_vim'
" syntax checking plugin
Plugin 'vim-syntastic/syntastic'
" show vertical bars for indented lines
Plugin 'Yggdroot/indentLine'
" json highlighting
Plugin 'elzr/vim-json'
"Latex
Plugin 'vim-latex/vim-latex'
"Vim Rest
Plugin 'diepm/vim-rest-console'
Below are some settings for above plugins
" React syntax
let g:jsx_ext_required = 0 " Allow JSX in normal JS files
let g:syntastic_javascript_checkers = ['eslint']

" tern
"enable keyboard shortcuts
let g:tern_map_keys=1
"show argument hints
let g:tern_show_argument_hints='on_hold'

"Latex
autocmd BufWritePost *.tex call Tex_RunLaTeX()
nmap <leader>m :up<cr>:call Tex_ViewLaTeX()<cr>
Tables
Below plugins will be helpful when dealing with tables.
" automatic tabling
" :Tabularize /= will align with =
Plugin 'godlygeek/tabular'
" An awesome automatic table creator & formatter
" ,tm to toggle TableModeToggle
Plugin 'dhruvasagar/vim-table-mode'
Encryption
Even though Vim has its encryption, blowfish2 when you use :X, it will prompt for password and encrypts the data in the file, but this is available from later versions of Vim.
If you want to use gpg, you can use this plugin
"Encryption
Plugin 'jamessan/vim-gnupg'
below are some settings for above plugin
"gpg
" Armor files
let g:GPGPreferArmor=1
" Set the default option
let g:GPGDefaultRecipients=["your-email@mail.com"]
augroup GPG
    autocmd!
    autocmd FileType gpg setlocal updatetime=12000
    autocmd CursorHold *.\(gpg\|asc\|pgp\) quit
augroup END
Session Management & Tmux
Below are some plugins to save and load sessions in Vim; if you are using tmux, follow steps here to restore vim sessions on tmux resurrect. vim-tmux-navigator gives bindings to move between vim and tmux quickly.
" navigate seamlessly between vim and tmux
Plugin 'christoomey/vim-tmux-navigator'

" session management
Plugin 'tpope/vim-obsession'
Terminal
Vim from 8.0, ships with terminal support, :terminal will bring up the terminal inside Vim.
Below bindings can help bring up the terminal inside Vim.
" Terminal
" vim-powered terminal in a split window
map <Leader>z :bel term ++close<cr>
tmap <Leader>z <c-w>:vert term ++close<cr>
Tips
JSON formatting
You can use command! or com! to have custom commands.
" custom command to indent JSON
com! FormatJSON %!python -m json.tool
com! IndentJSON %!jq -r .
Now in Vim when you type :FormatJSON, python -m json.tool will be exected in the shell with the buffer content in Vim, and the output is pasted back to the current buffer. So if you have unindented JSON, it will be indented after this command.
You can also use jq to accomplish this; make sure you have jq installed.
Vim bindings in other applications
bash&zshprovides vim mode, setset -o viin configuration.- vscode Vim Plugin to enable vim bindings.
- Browser, both
FirefoxandChromehaveVimiumplugin to enable vim bindings. Tmuxenable Vim in copy mode to navigate and copy text.Emacs, use the evil plugin to get vim bindingslesstool uses vim bindings
Conclusion
Above are some ways to customize Vim, if you want a complete configuration file of the above examples, refer here. There is much more that you can do. If you are more interested in learning Vim, you can also check Drew Neil books Modern Vim and Practical Vim.
Happy Vimming.
– RC

Comments