In the below post, I will walkthrough on how to customize zsh. Ensure you installed zsh; the configuration file will be in your home directory ~/.zshrc. I recommend using
oh-my-zsh as it provides all the necessary settings by default.
If you want to configure from scratch, you can pick the required configurations.
- Plugin Manager
- Command history
- Enhancements
- Interesting plugins
- Aliases
- Multiple Platforms
- Functions
- Conclusion
Plugin Manager
oh-my-zsh by default comes with some plugins. You can find all available plugins here. All plugins are documented on what they do.
You can enable them like below.
plugins=(
	git
	fzf
	...
)

# SOURCE oh-my-zsh after plugins
source $ZSH/oh-my-zsh.sh
Make sure you source $ZSH/oh-my-zsh.sh after defining plugins.
By default, you should have a basic template in ~/.zshrc after installation. If not, you can refer to this template
You can add the below line in your ~/.zshrc to automatically update zsh.
# automatically update omz
zstyle ':omz:update' mode auto
Some plugins are not available in oh-my-zsh plugins folder. For those, you can use different plugin managers like zinit, Antibody or zplug.
Here I am showing with zplug. To install zplug
curl -sL --proto-redir -all,https https://raw.githubusercontent.com/zplug/installer/master/installer.zsh | zsh
In your ~/.zshrc add below lines,
# zplug
source ~/.zplug/init.zsh

# below is how install plugin
# zplug "<plugin-name>"

if ! zplug check; then
    zplug install
fi
# source plugins and add commands to the PATH
zplug load
Instead of having plugins listed in plugins for oh-my-zsh, you can load oh-my-zsh plugins with zplug.
zplug 'plugins/git', from:oh-my-zsh, if:'which git'
zplug 'plugins/copybuffer', from:oh-my-zsh
...
Command history
To better manage command history, you can set the below Options.
Note: If you are using oh-my-zsh, then you don’t need to set below settings manually in your configuration, as these are already set, you can refer history.zsh
# Search options
HISTFILE=~/.zsh_history
HISTSIZE=10000
SAVEHIST=10000

# share history between shells
setopt SHARE_HISTORY
# save each command's beginning timestamp and the duration to the history file
setopt EXTENDED_HISTORY
# adds history
setopt APPEND_HISTORY
# adds history incrementally and share it across sessions
setopt INC_APPEND_HISTORY
# don't record dupes in history
setopt HIST_IGNORE_ALL_DUPS
setopt HIST_REDUCE_BLANKS
setopt HIST_IGNORE_SPACE
setopt HIST_VERIFY
setopt HIST_EXPIRE_DUPS_FIRST
You can enable edit-command-line so that you can edit the command in your favorite editor like vim/emacs. If you have long command and want to edit using an editor, this will be helpful.
autoload -U edit-command-line
zle -N edit-command-line
And you can bind that to Ctrl+x Ctrl+e to trigger edit-command-line
bindkey '^xe' edit-command-line
bindkey '^x^e' edit-command-line
Below is how it works

For more zsh/bash navigation tips, you can refer to this post
Enhancements
Below are a few enhancements configured to speed up load times and completions.
Completions
You can define how completion should work whenever you tab on *<TAB> or ~/dir/<TAB>.
oh-my-zsh already provides some set of configurations for completion; you can refer
completion.zsh
For example, if you want to get the latest file modified when you tab in a directory. You can have the below setting.
zstyle ':completion:*' file-sort date
mv ~/Desktop/<TAB> will pull the recently modified file name when you do the tab.
Fix slow paste
When pasting text in zsh with oh-my-zsh, it might impact performance if the text is huge. You can disable it by below setting
DISABLE_MAGIC_FUNCTIONS="true"
Interesting plugins
Jumping between directories
zsh-z - mostly, we will be switching directories a lot; this plugin allows us to jump quickly between directories. To install
zplug "agkozak/zsh-z"
Auto suggestions
zsh-autosuggestions - this plugin allows to suggest commands as you type.
zplug "zsh-users/zsh-autosuggestions"
You can use the right arrow (->) or Ctrl+@ to accept the suggestion.
By having the above key bind, you can accept auto suggestions using Ctrl + space
bindkey '^ ' autosuggest-accept
Syntax highlighting
zsh-syntax-highlighting Provides syntax highlighting for various commands.
zplug "zsh-users/zsh-syntax-highlighting", defer:2
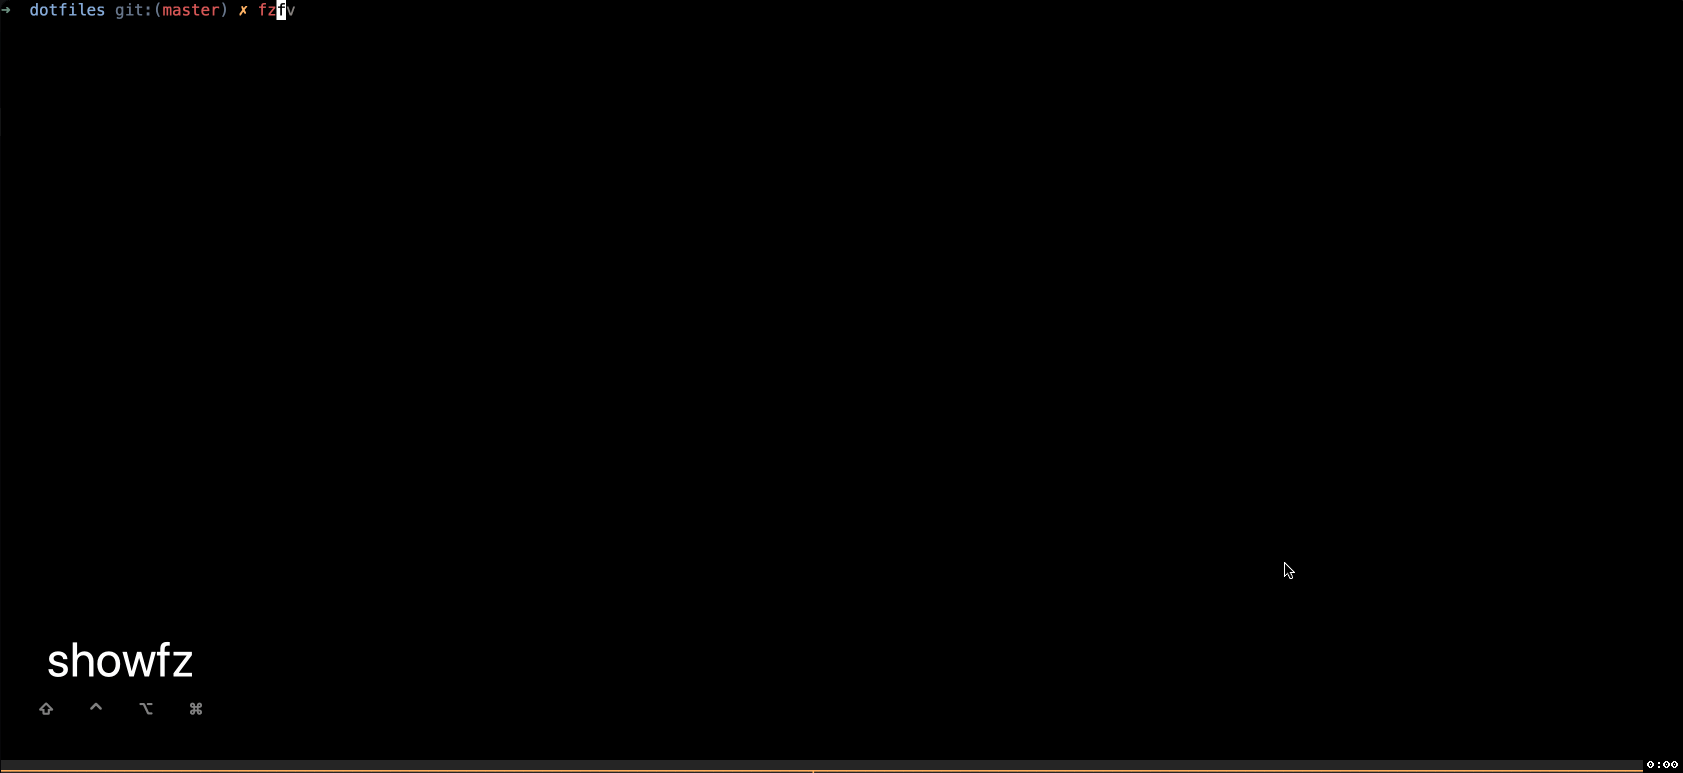
Fuzzy search
fzf - is an amazing plugin that provides a fuzzy search for history and many other completions. To install
git clone --depth 1 https://github.com/junegunn/fzf.git ~/.fzf
~/.fzf/install
If you are using oh-my-zsh, you can load fzf by including in the plugins variable.
plugins=(
	...
	fzf
)
If not then you need have this [ -f ~/.fzf.zsh ] && source ~/.fzf.zsh to enable fzf.
Now, if you try Ctrl+r, you should get a fuzzy search for previous commands.
If you try Ctrl+t you should get a fuzzy search for all file names in that directory.
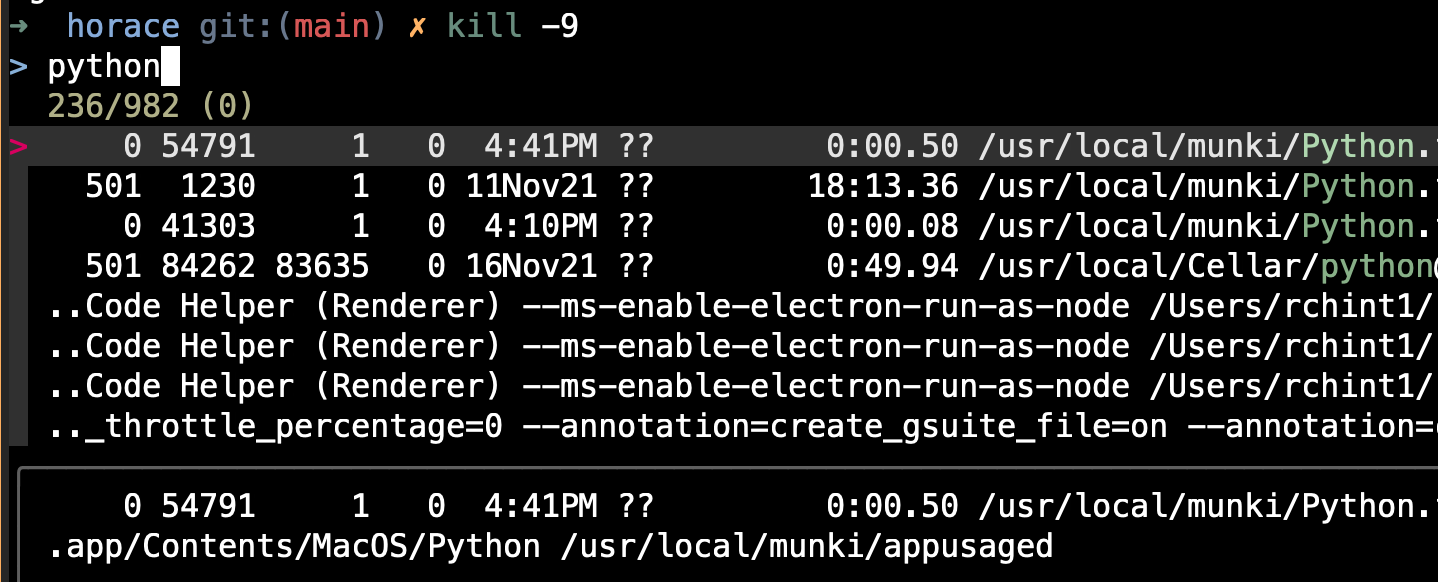
You can also do kill -9 Tab; you can fuzzy search for a process to get process id to kill.
You can also do Alt + c to fuzzy search all the directories in the current directory and change to it.
Quickly copy previous commands
copybuffer is a
oh-my-zsh plugin provides Ctrl+o to copy the current command to clipboard.
To enable, append copybuffer to plugins list.
plugins=(
	...
	copybuffer
)
I will often use this to copy previous commands; first, I will Ctrl + r find the command and then do Ctrl+o to copy the command to
clipboard.
Kubernetes
kubectl gives common aliases and completions for kubectl command.
plugins=(
	...
	kubectl
)
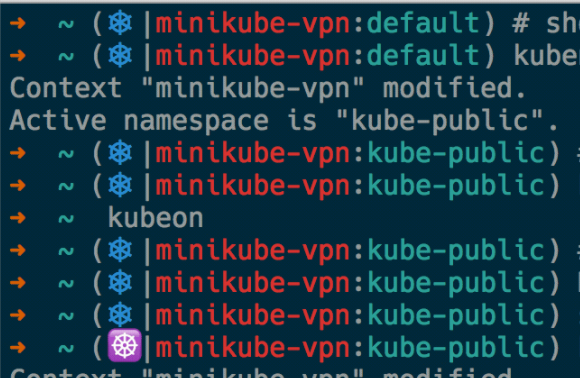
kubectx gives options to switch contexts/clusters.
plugins=(
	...
	kubectx
)
kube-ps1 which shows the current Kubernetes cluster name and namespace in the command prompt
plugins=(
	...
	kube-ps1
)
# KUBERNETES (this needs to be after)
PROMPT='$(kube_ps1)'$PROMPT
If you want fuzzy search clusters and namespaces, check kube-fzf
to search contexts and namespaces. You need to install krew package manager for kubectl plugins
to install kube-fzf.
GPG and keychain
oh-my-zsh provides gpg-agent and keychain plugins. gpg-agent starts the gpg agent and keychain maintains
the private key of gpg and id_rsa so that you don’t need to re-enter the password multiple times.
You can add your agents and identities like below
zstyle :omz:plugins:keychain agents gpg,ssh
zstyle :omz:plugins:keychain identities id_rsa YOUR_GPG_KEY
And to enable, do below
plugins=(
	...
    keychain
	gpg-agent
)
Also, check kubectx and kubens, which gives a fuzzy search on kubectl context and namespace.
Aliases
By using aliases, you can make long commands short and easy to remember.
I suggest keeping all your aliases in a separate file, aliases.zsh, and putting this file in the ~/.oh-my-zsh/custom folder. All *.zsh files will be loaded when oh-my-zsh.zsh is sourced.
Below are some aliases that can be useful.
Webserver
To quickly start a web server.
alias webshare='python -m SimpleHTTPServer'
Copy working directory
# Copy the working dir to the clipboard
alias cpwd='pwd | xargs echo -n | clipcopy'
Find current git branch
# find current branch
alias gitc='git branch | cat | grep "*" | awk "{print $2}"'
To search using ag + fzf
To quickly search words using ag and fzf
alias agf='ag --nobreak --nonumbers --noheading . | fzf'
To open browser
# open chrome profile 1
alias start-chrome-profile1='/Applications/Google\ Chrome.app/Contents/MacOS/Google\ Chrome --ignore-certificate-errors --profile-directory="Profile 1" &> /dev/null &'
# open chrome profile 2
alias start-chrome-profile2='/Applications/Google\ Chrome.app/Contents/MacOS/Google\ Chrome --ignore-certificate-errors --profile-directory="Profile 2" --proxy-server="socks5://localhost:9002" &> /dev/null &'
# open chrome canary with socks
alias start-canary-socks='/Applications/Google\ Chrome\ Canary.app/Contents/MacOS/Google\ Chrome\ Canary --proxy-server="socks5://localhost:9002" &> /dev/null &'
# open chrome canary without proxy
alias start-canary-noproxy='/Applications/Google\ Chrome\ Canary.app/Contents/MacOS/Google\ Chrome\ Canary --no-proxy-server &> /dev/null &'
Multiple Platforms
To handle multiple platforms in your ~/.zshrc you can do like below.
Basically below checks if brew exists then its MacOS, if apt exists then its Debian based OS.
if command -v brew > /dev/null; then
	CONDA_PATH=$HOME/opt/anaconda3
elif command -v apt > /dev/null; then
	CONDA_PATH=$HOME/anaconda3
fi
Or else you can rely on OSTYPE set by oh-my-zsh lib.
if [[ "${OSTYPE}" == darwin* ]]; then
	CONDA_PATH=$HOME/opt/anaconda3
elif [[ "${OSTYPE}" == linux* ]]; then
	CONDA_PATH=$HOME/anaconda3
fi
Functions
With functions, you add more complex commands. You can pass arguments, and you can bind them to key bindings.
Usually, you can define functions in ~/.zshrc; I would suggest keeping them in separate files depending on their
functionality.
OPEN_CMD and COPY_CMD
Across platforms, command to open applications and copy to clipboard changes, so for this reason having below
function can help to set OPEN_CMD and COPY_CMD. Later in our functions, we can use these variables to make
our functions work across platforms.
case "$OSTYPE" in
        (darwin*) OPEN_CMD='open'  ;;
        (cygwin*) OPEN_CMD='cygstart'  ;;
        (linux*) [[ "$(uname -r)" != *icrosoft* ]] && OPEN_CMD='nohup xdg-open'  || {
                        OPEN_CMD='cmd.exe /c start ""'
                        [[ -e "$1" ]] && {
                                1="$(wslpath -w "${1:a}")"  || return 1
                        }
                } ;;
        (msys*) OPEN_CMD='start ""'  ;;
        (*) echo "Platform $OSTYPE not supported"
                return 1 ;;
esac

export OPEN_CMD

if [[ "${OSTYPE}" == darwin* ]] && (( ${+commands[pbcopy]} )) && (( ${+commands[pbpaste]} )); then
    COPY_CMD=pbcopy
    PASTE_CMD=pbpaste
elif [ -n "${DISPLAY:-}" ] && (( ${+commands[xclip]} )); then
    COPY_CMD='xclip -in -selection clipboard'
    PASTE_CMD='xclip -out -selection clipboard'
elif [ -n "${DISPLAY:-}" ] && (( ${+commands[xsel]} )); then
    COPY_CMD='xsel --clipboard --input'
    PASTE_CMD='xsel --clipboard --output'
fi

export COPY_CMD
export PASTE_CMD
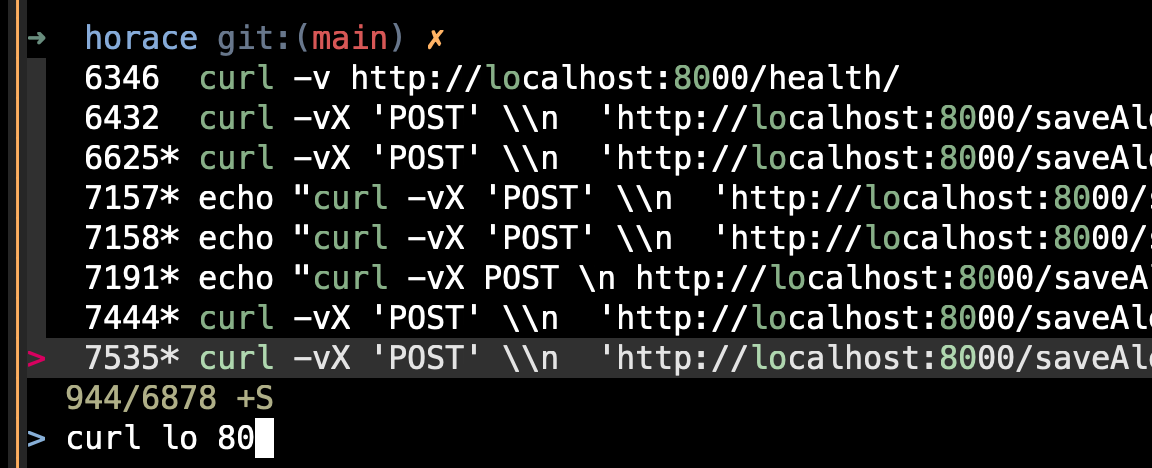
Preview and copy previous command
By default, with fzf, you get Ctrl+r to go through history.
But let’s say you want to preview the long command and copy it. You can accomplish this using the below function.
# preview and copy command history
local _commandContent="echo -n {} | sed 's/^ [^ ]* //g;s/\\\\n/\\\\\\n/g'"
function history-manager() {
	(fc -l 1 || history) | fzf +s --tac --reverse \
		--tiebreak=index --no-multi --ansi \
		--preview "$_commandContent | bat --style=numbers --color=always" \
		--header "enter to copy to clipboard, alt-v to view" \
		--bind "enter:execute[$_commandContent | $COPY_CMD]+abort" \
		--bind "alt-v:execute:$_commandContent | less -RiN"
}
Once you add the above function and source it (source ~/.zshrc)
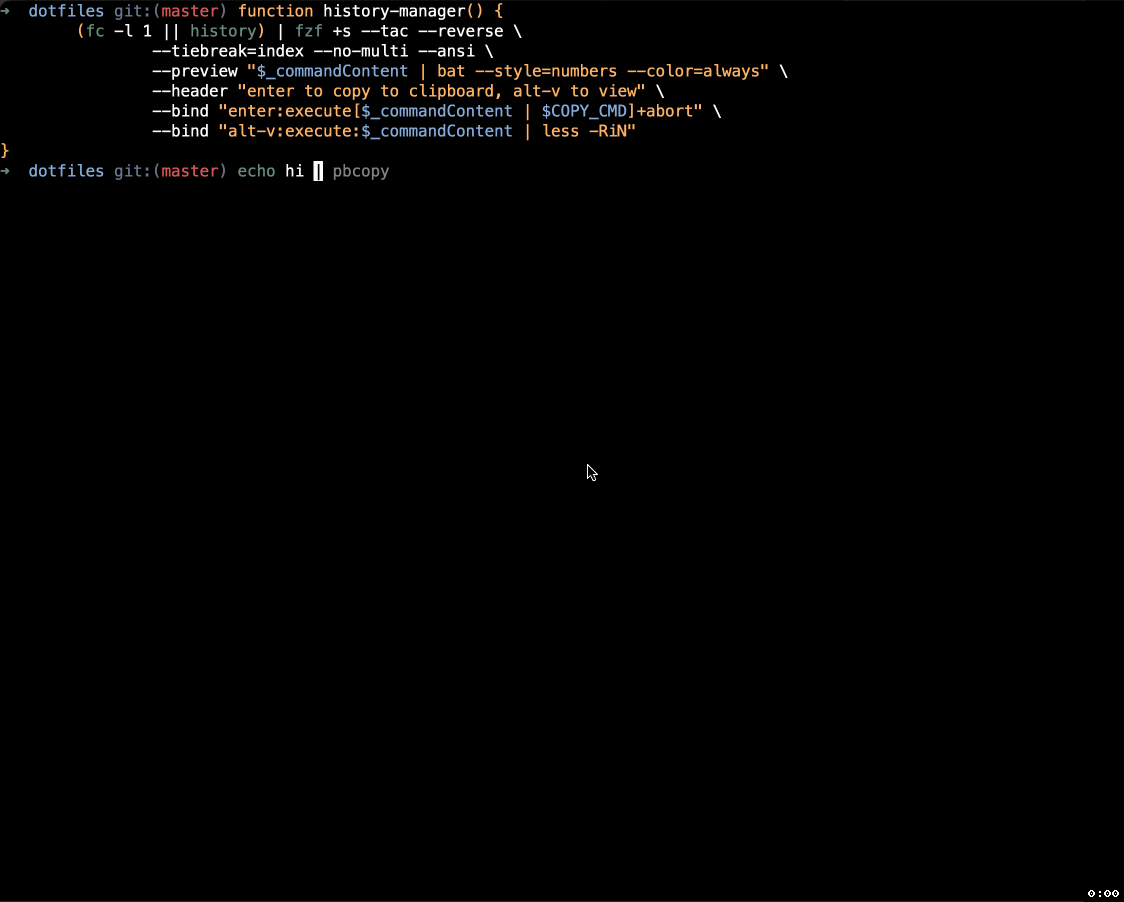
Now, if you want to bind this function to a keyboard shortcut.
You can do this by adding the below lines; you need to use zle
and bindkey to bind a function to a keyboard shortcut.
zle -N history-manager
bindkey '^x^r' history-manager
If you press ctrl + x , ctrl+r, history-manager will be invoked.
Search chrome history and bookmarks
To search chrome history, first, we need to find the location of the History database and a bookmarks JSON file.
if [[ "${OSTYPE}" == darwin* ]]; then
    CHROME_HISTORY=~/Library/Application\ Support/Google/Chrome/Default/History
    CHROME_BOOKMARKS=~/Library/Application\ Support/Google/Chrome/Default/Bookmarks
elif [[ "${OSTYPE}" == linux* ]]; then
    CHROME_HISTORY=~/.config/google-chrome/Default/History
    CHROME_BOOKMARKS=~/.config/google-chrome/Default/Bookmarks
fi
Next define below functions to parse history database and bookmarks json file.
# Browse chrome history
function chrome_search_history() {
  local cols sep
  cols=$(( COLUMNS / 3 ))
  sep=''


  # Copy History DB to circumvent the lock
  # - See http://stackoverflow.com/questions/8936878 for the file path
  cp -f $CHROME_HISTORY /tmp/temph

  sqlite3 -separator $sep /tmp/temph \
    "select substr(title, 1, $cols), url
     from urls order by last_visit_time desc" |
  awk -F $sep '{printf "%-'$cols's  \x1b[36m%s\n", $1, $2}' |
  fzf --ansi --multi | sed 's#.*\(https*://\)#\1#' | xargs $OPEN_CMD
}

# Browse chrome bookmarks
function chrome_search_bookmarks() {
  grep 'url.:' $CHROME_BOOKMARKS |
      awk '{print $2}' |
      sed 's/"//g' |
  fzf --ansi --multi | sed 's#.*\(https*://\)#\1#' | xargs $OPEN_CMD
}
You can bind them to keys like below, ctrl+x a to trigger chrome_search_history and
ctrl+x b to trigger chrome_search_bookmarks
zle -N chrome_search_history
zle -N chrome_search_bookmarks

bindkey '^xa' chrome_search_history
bindkey '^xb' chrome_search_bookmarks
Search & preview Git history and status
To quickly preview a git file history or branch history, you can use the below function
Pre-requisites -
- bat (if not available change
| batto| less -R) - diff-so-fancy
alias glNoGraph='git log --color=always --format="%C(auto)%h%d %s %C(black)%C(bold)%cr% C(auto)%an" "$@"'
local _gitLogLineToHash="echo {} | grep -o '[a-f0-9]\{7\}' | head -1"
local _viewGitLogLine="$_gitLogLineToHash | xargs -I % sh -c 'git show --color=always % | diff-so-fancy'"

# fshow_preview - git commit browser with previews
function fshow_preview() {
    glNoGraph |
        fzf --no-sort --reverse --tiebreak=index --no-multi \
            --ansi --preview $_viewGitLogLine \
                --header "enter to view, alt-y to copy hash" \
                --bind "enter:execute:$_viewGitLogLine   | bat" \
                --bind "alt-y:execute:$_gitLogLineToHash | $COPY_CMD"
}
Below is how it will work.
If you look at the function, you see two bindings, on enter to view the commit in bat and
on alt + y to copy the git commit hash.
Similarly you can define another function to go through git status and add to stage or revert to head version.
alias gsStatus='git status -s "$@"'
local _gitStatusLine="echo {} | awk '{print $2}' | head -1"
local _viewGitStatusLine="$_gitStatusLine | xargs -I % sh -c 'git diff --color=always % | diff-so-fancy'"
function fstatus_preview() {
    gsStatus | awk '{print $2}' |
        fzf --no-sort --reverse --tiebreak=index --no-multi \
            --ansi --preview $_viewGitStatusLine \
                --header "enter to view, alt-a to run git add, alt-c to run git checkout --" \
                --bind "enter:execute:$_viewGitStatusLine | less -R" \
                --bind "alt-a:execute:$_gitStatusLine | xargs git add" \
                --bind "alt-c:execute:$_gitStatusLine | xargs git checkout --" \
}
On invoking fstatus_preview, below is how it behaves

If you look at the bindings, enter to view the changes done, alt-a to trigger git add on that file.
If you want to revert to the head version, you can use alt-c to revert the changes to the head.
You can bind the above functions to keys like below.
ctrl+x g to trigger fstatus_preview and ctrl+x s to trigger fshow preview
zle -N fshow_preview
zle -N fstatus_preview

bindkey '^xg' fstatus_preview
bindkey '^xs' fshow_preview
File Manager
You can write your file manager like below.
# file manager
file-manager() {
	find . -type f |
	fzf --no-sort --reverse --tiebreak=index \
		--no-multi  --ansi \
		--preview 'bat --style=numbers \
		               --color=always \
					   --line-range :500 {}' \
		--header "
			enter to view, alt-v to open in vim,
			alt-n to open in nvim, alt-c to open in code
			alt-p to copy file path, alt-a to copy file contents" \
		--bind "enter:execute:echo {} | xargs bat" \
		--bind "alt-v:execute:echo {} | xargs vim" \
		--bind "alt-n:execute:echo {} | xargs nvim" \
		--bind "alt-c:execute:echo {} | xargs code" \
		--bind "alt-p:execute:echo $PWD/{} | $COPY_CMD" \
		--bind "alt-a:execute:cat {} | $COPY_CMD"
}
zle -N file-manager
bindkey '^x^f' file-manager
When you do ctrl x, ctrl f - you will get a window to search for all files in that folder.
In the menu, you can see different options you can perform on the selected.
| Keyboard shortcut | Action |
|---|---|
| Enter | Open with bat |
| alt+v | open with vim |
| alt+n | open with nvim |
| alt+c | open with visual studio code |
| alt+p | copy file path |
| alt+a | copy file contents |
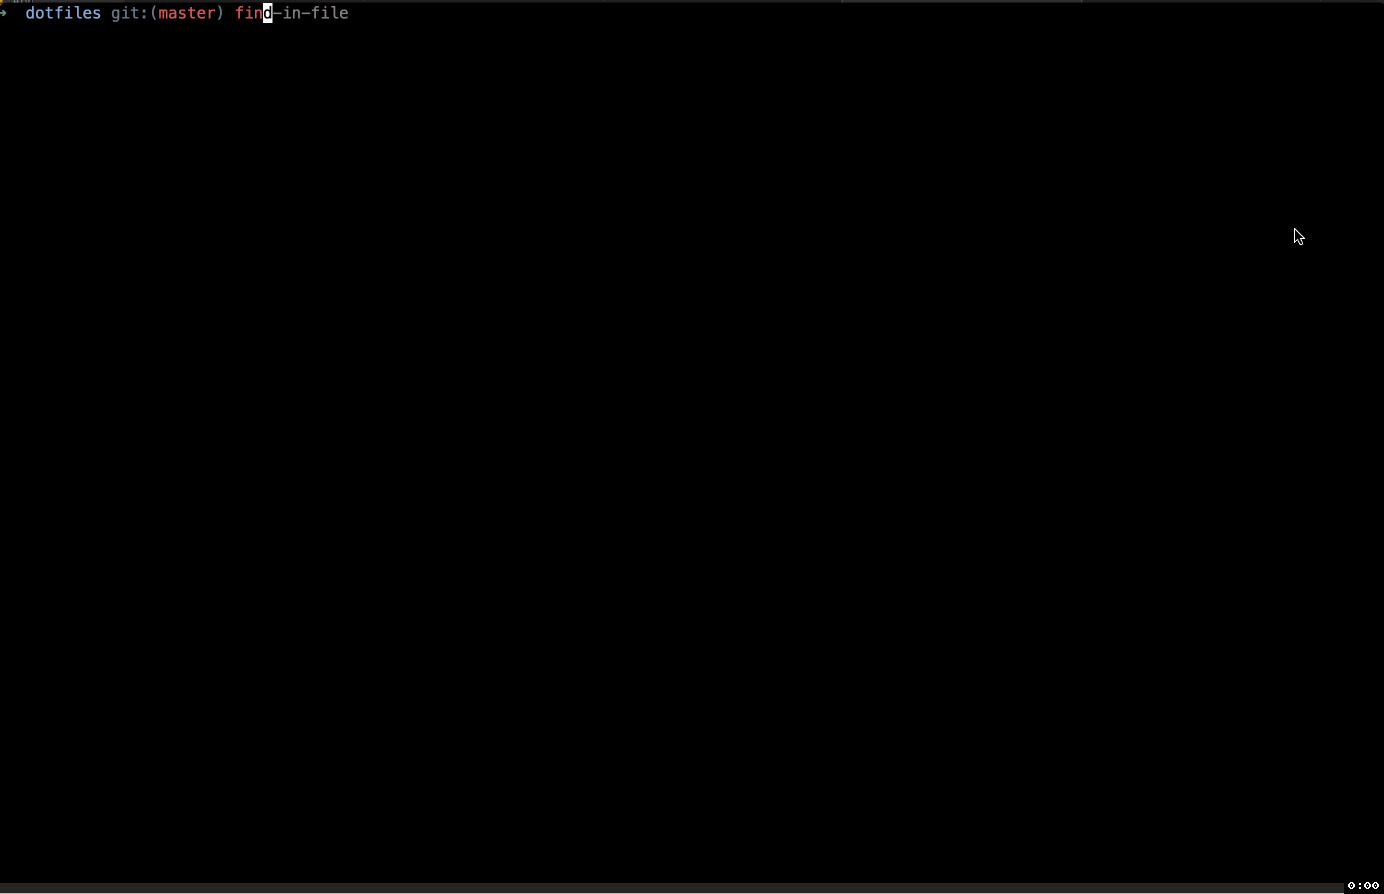
Interactive searching in files
You can use grep, rg or ag to search for files. If you want to do an interactive search.
alias agf='ag --nobreak --nonumbers --noheading . | fzf'
alias rgf='rg --column --line-number --no-heading --smart-case . | fzf'

find-in-file() {
    #!/bin/bash
    [[ -n $1 ]] && cd $1 # go to provided folder or noop
    RG_DEFAULT_COMMAND="rg -i -l --hidden --no-ignore-vcs"

    selected=$(
    FZF_DEFAULT_COMMAND="rg --files" fzf \
      -m \
      -e \
      --ansi \
      --phony \
      --reverse \
      --bind "ctrl-a:select-all" \
      --bind "change:reload:$RG_DEFAULT_COMMAND {q} || true" \
      --preview "rg -i --pretty --context 2 {q} {}" | cut -d":" -f1,2
    )

    [[ -n $selected ]] && vim $selected # open multiple files in editor
}
zle -N find-in-file
bindkey '^xf' find-in-file
Now you have two aliases, agf and rgf, to fuzzy search for words inside all files in that folder.
And when you do ctrl x, f, you can search and preview the content, and on enter, you can open with
your editor here. I used neo vim.
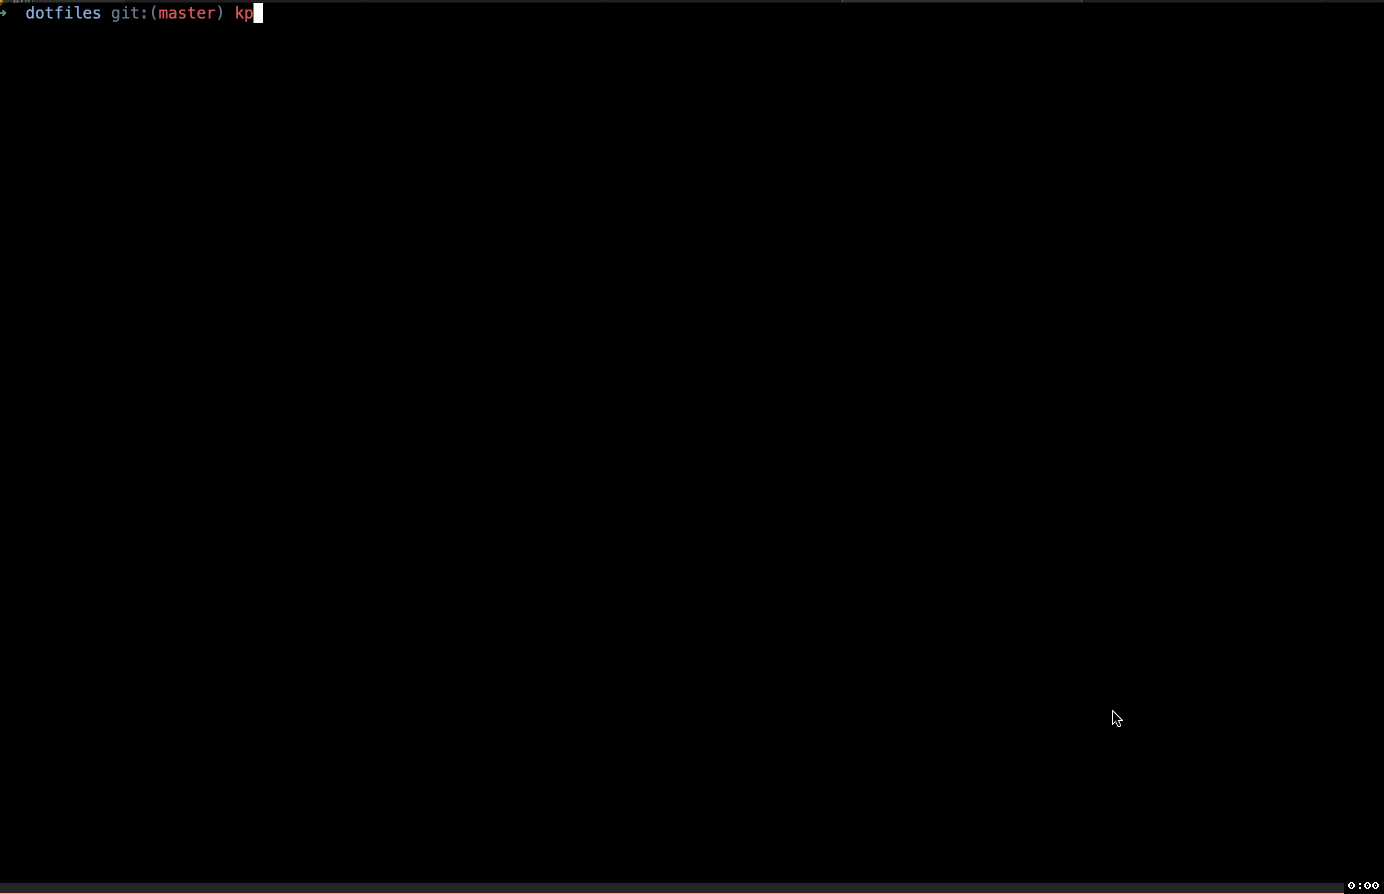
Kubernetes
Below functions will help to quickly deal with pods and deployments.
# PODS
kpe() {
  selected=$(k get pods | fzf | awk '{print $1}')
  [[ -n $selected ]] && k exec -it $selected -- sh
}
kpl() {
  selected=$(k get pods | fzf | awk '{print $1}')
  [[ -n $selected ]] && k logs $selected -f | less -i
}
# DEPLOYMENTS
kde() {
  selected=$(k get deployments | fzf | awk '{print $1}')
  [[ -n $selected ]] && k edit deployment $selected
}
Conclusion
Using the above steps, I think you got some idea on how to customize zsh. If you want to refer to all the above configurations, you can find it here – RC


Comments