In this post, I will go through installing Nextcloud (self-hosting cloud storage) using VPS (Virtual private server).
You can also use your home server. Nextcloud can be installed using LAMP (Linux Apache Mysql PHP) stack or LEMP (Linux
Ngnix Mysql PHP) stack, here I will be using the LAMP stack.
Here I show the steps to install Nextcloud 23 on Ubuntu 21.10, but the same steps can
be used for any OS.
- Procure Linux VPS
- Install Apache
- Install MariaDB
- Install PHP
- Install Nextcloud
- Create a domain
- Register domain in Cloudflare
- Get the SSL certificate from Cloudflare
- Configure Nextcloud site in Apache
- Debugging issues
- Theme
- Hardening Login
- Sync your data from Mobile
- Interesting Apps
- Additional storage
- Accessing using WebDAV
- Conclusion
Procure Linux VPS
There are many cloud providers like Digital Ocean, Vultr, Amazon Light Sail, NJALLA who gives VPS, choose anyone and VPS mostly with 1Core, 1GB RAM, 25GB, and 1TB Bandwidth costs about 5$/month. When creating VPS, you will be asked to enter your SSH public key to log in using SSH. Once you create a VPS, you will be given an IP. You can use that IP to log in using SSH.
Install Apache
First, update and upgrade your OS.
apt update && apt upgrade
Next, install Apache
apt install apache2
With the below commands, you can stop, start or restart Apache.
systemctl stop apache2
systemctl start apache2
systemctl restart apache2
You can check the status using the below command
systemctl status apache2
Install MariaDB
The next step is to install MariaDB
apt install mariadb-server mariadb-client
Enable MariaDB service
systemctl enable mariadb
Run the below command to secure the database server.
mysql_secure_installation
On prompts, use below to answer
If you've just installed MariaDB and haven't set the root password yet, you should press enter here.
Enter current password for root (enter for none): PRESS ENTER

Switch to unix_socket authentication [Y/n] n
Change the root password? [Y/n] n
Remove anonymous users? [Y/n] y
Disallow root login remotely? [Y/n] y
Remove test database and access to it? [Y/n] y
Reload privilege tables now? [Y/n] y

All done!
With the below commands, you can stop, start or restart MariaDB.
systemctl stop mariadb
systemctl start mariadb
systemctl restart mariadb
You can check the status using the below command
systemctl status mariadb
Next login to MariaDB using root
mysql -u root -p
Create a database named nextcloud (this can be any name)
CREATE DATABASE nextcloud;
Create a user, replace nextclouduser with any name you want
CREATE USER 'nextclouduser'@'localhost' IDENTIFIED BY 'new_password_here';
Grant permissions and exit
GRANT ALL ON nextcloud.* TO 'nextclouduser'@'localhost' WITH GRANT OPTION;
FLUSH PRIVILEGES;
EXIT;
Install PHP
install php and required modules
apt install php php-zip php-dom php-xmlwriter php-curl php-mysql
At this time of writing, PHP 8.0 is installed. Open php.ini file
vi /etc/php/8.0/apache2/php.ini
Make sure you have below settings, for timezone you can refer this
file_uploads = On
allow_url_fopen = On
short_open_tag = On
memory_limit = 256M
upload_max_filesize = 100M
max_execution_time = 360
date.timezone = America/Chicago
Install Nextcloud
Download the latest version of Nextcloud from here
wget https://download.nextcloud.com/server/releases/nextcloud-23.0.0.zip -P /tmp
Make sure you have zip installed and unzip to /var/www folder
apt install zip
unzip /tmp/nextcloud-23.0.0.zip -d /var/www
Give ownership to www-data user
chown -R www-data:www-data /var/www/nextcloud/
Create a domain
You can obtain domain from domain registrar services like Namecheap, Godaddy, Google Domains. Mostly domains cost around 12$/year.
Register domain in Cloudflare
Once the domain is created, register a free account in Cloudflare and update the named servers to Cloudflare
in your domain registrar (where you bought the domain). Cloudflare has good documentation, and you can refer steps here
Once named servers are added, you should add DNS records in Cloudflare.
Click on your domain in the dashboard, in the menu, select DNS and Add a A record with your VPS IP and
set the proxy status to Proxied (meaning the traffic will be proxied through Cloudflare servers.)
Get the SSL certificate from Cloudflare
Click on your domain in the dashboard, in the menu, select SSL/TLS, In the overview, select Full (strict) for SSL/TLS
encryption mode (meaning end to end is TLS encrypted.). Click on Origin Server and then click on Create Certificate
You will be given both private key and public key, copy them and save
in your VPS at this location, for example
# your public key
/etc/ssl/certs/pub.crt
# your private key
/etc/ssl/certs/pri.key
Configure Nextcloud site in Apache
Now its time to setup Nextcloud in Apache.
Go to cd /etc/apache2/sites-available/ and add below details in nextcloud.conf file.
<VirtualHost *:80>
  ServerName example.com
  ServerAlias www.example.com
  Redirect permanent / https://example.com/
</VirtualHost>

<VirtualHost *:443>
  ServerName example.com
  ServerAlias www.example.com
  DocumentRoot /var/www

  SSLEngine On
  SSLCertificateFile /etc/ssl/certs/pub.crt
  SSLCertificateKeyFile /etc/ssl/certs/pri.key

  Protocols h2 http:/1.1

  Alias /nextcloud "/var/www/nextcloud/"

  <Directory /var/www/nextcloud/>
    Options +FollowSymlinks
    AllowOverride All

   <IfModule mod_dav.c>
    Dav off
   </IfModule>

    SetEnv HOME /var/www/nextcloud
    SetEnv HTTP_HOME /var/www/nextcloud
  </Directory>
</VirtualHost>
Now enable site and some required modules.
a2ensite nextcloud.conf
a2enmod rewrite
a2enmod headers
a2enmod env
a2enmod dir
a2enmod mime
Restart your apache server
systemctl restart apache2
If you go to https:\\your-domain\nextcloud, you should be getting the setup page below.
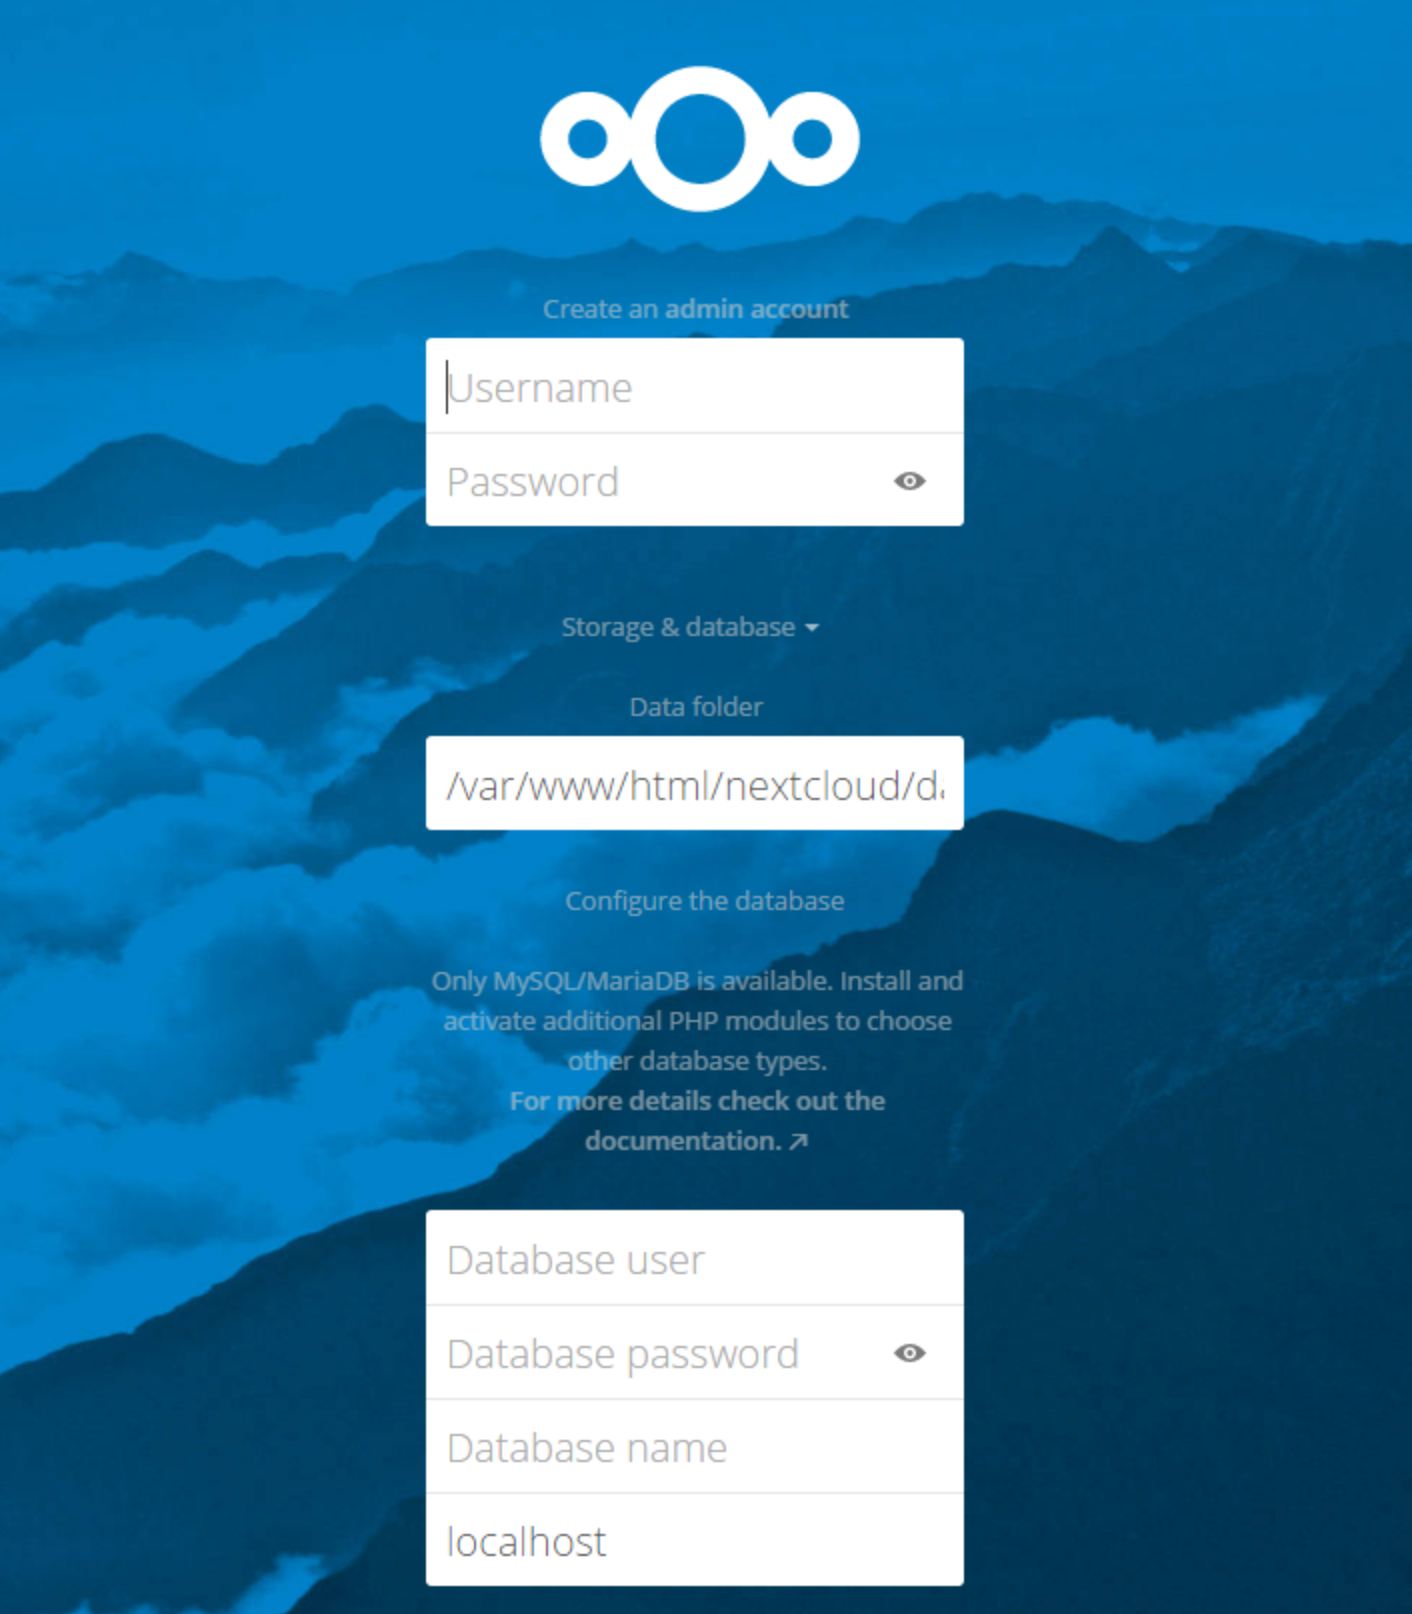
Now here, create an admin account in the data folder, give the data folder path (here is where the data will be stored), and give the database details which you created in Install MariaDB.
Debugging issues
If you cannot access nextcloud, go to your data folder, which you have selected on the nextcloud setup page.
For example - if you selected /var/www/nextcloud/data as your data folder then in that folder you will be seeing
nextcloud.log file, to check what is the issue. For example below error is saying that its not able to connect to
database.
{"reqId":"nXV2NiQ2sRTnADx3GgqN","level":3,"time":"2022-01-05T00:57:28+00:00","remoteAddr":"162.158.255.231","user":"--","app":"core","method":"GET","url":"/nextcloud/index.php/svg/core/categories/organization?color=fff&v=1","message":"Failed to connect to the database: An exception occurred in the driver: SQLSTATE[HY000] [2002] Connection refused","userAgent":"Mozilla/5.0 (X11; Linux x86_64; rv:95.0) Gecko/20100101 Firefox/95.0","version":"23.0.0.10","exception":{"Exception":"Doctrine\\DBAL\\Exception","Message":"Failed to connect to the database: An exception occurred in the driver: SQLSTATE[HY000] [2002] Connection refused","Code":2002,"Trace":
Go and check the status of the database - systemctl status mariadb. If you see it is down, restart it.
If you are on 1GB RAM, then mostly you might get oom (out of memory) issues, and mariadb might get killed.
Either you can resize your VPS to add more RAM, or you can add swap space to resolve
this issue. You can do that by below steps
# allocate 3G swap; you can create more if needed.
fallocate -l 3G /swapfile
# set right permissions
chmod 600 /swapfile
# verify swap file
ls -lh /swapfile
# make swap file
mkswap /swapfile
# Enable swapfile
swapon /swapfile
# verify if swap is enabled
swapon --show
free -h
# to persist the swap on reboot
cp /etc/fstab /etc/fstab.bak
echo '/swapfile none swap sw 0 0' | tee -a /etc/fstab
# verify if swap file added to fstab
cat /etc/fstab
Theme
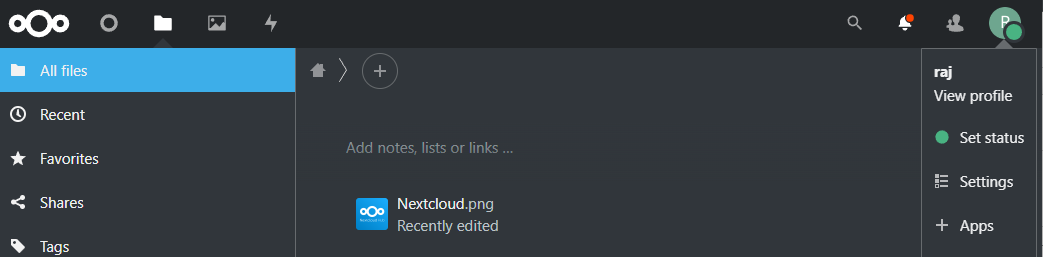
To change theme, click on right corner icon, and click on Apps
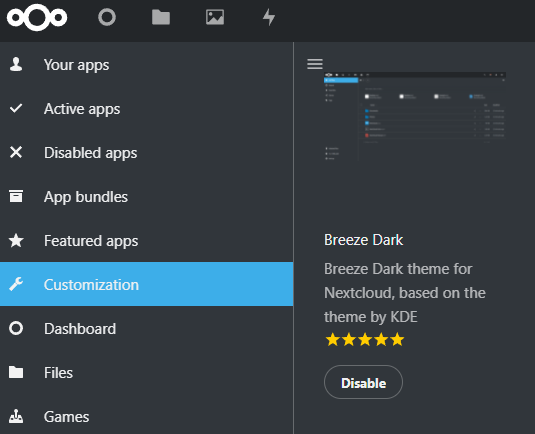
Then click on Customization and download and enable Breeze Dark
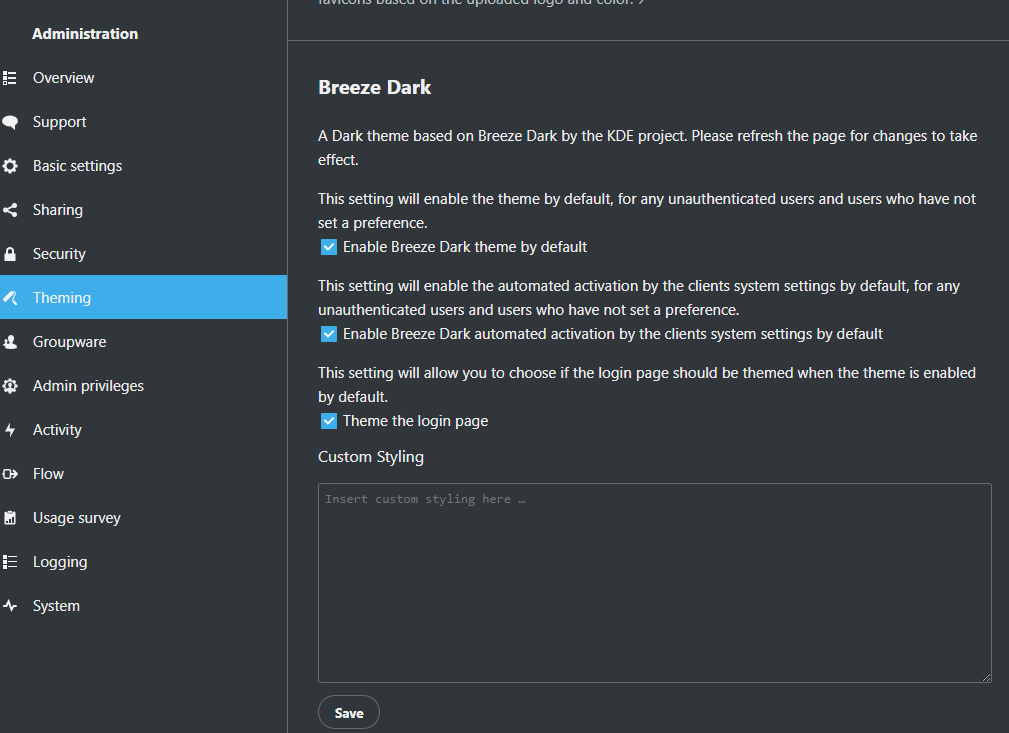
Then go to settings, select Theming in the Administration section, enable Breeze Dark theme, and save.
Hardening Login
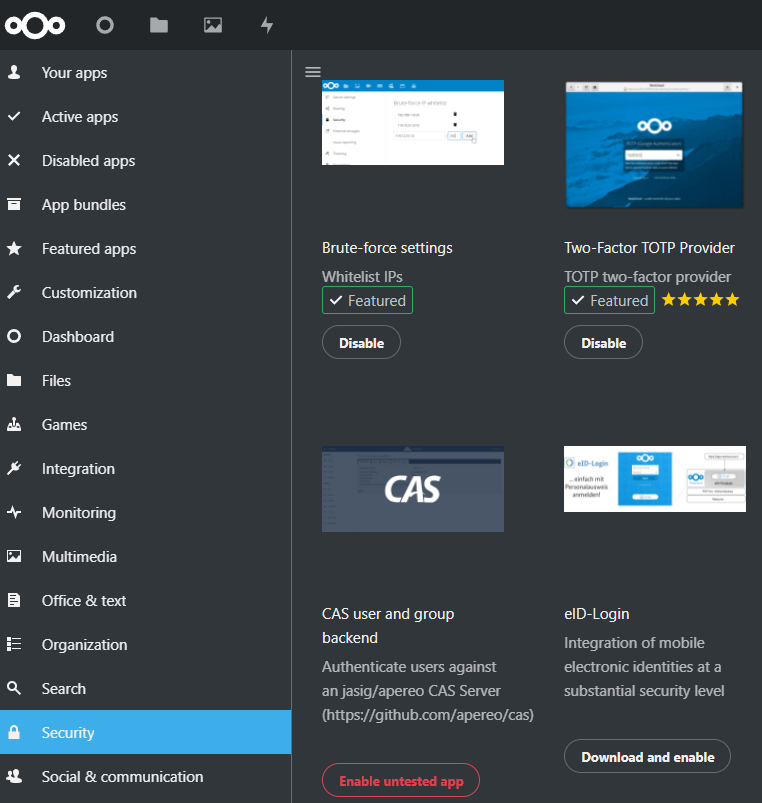
It is best to enable 2-factor authentication. Go to Apps, click on the Security tab and
download and enable Two-Factor TOTP Provider.
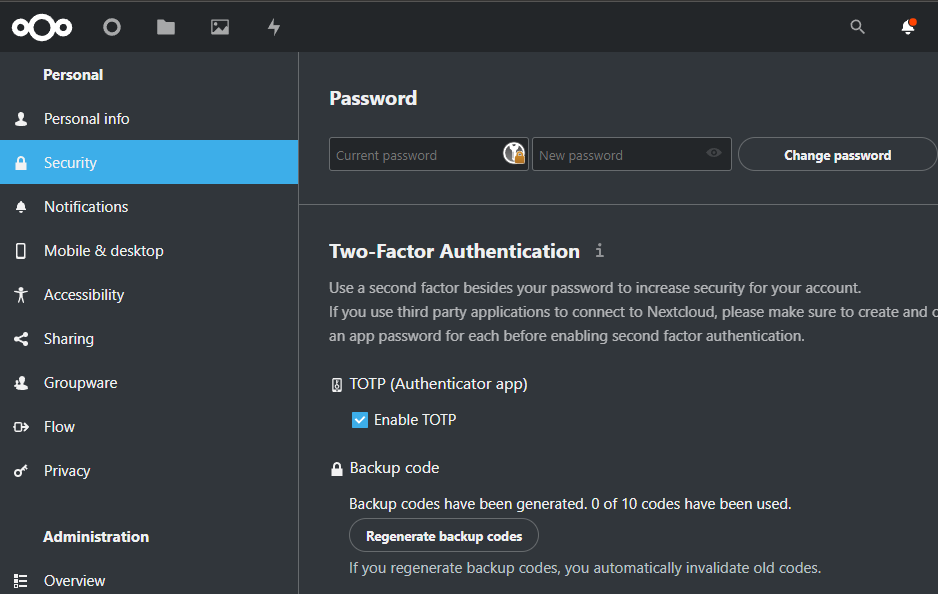
Now go to settings, select Security in the Personal info section and select Enable TOTP; this will give the secret both in
text and QR Code format, use your TOTP client like Google Authenticator or Authy to store the secret. Once added
copy the six-digit number and verify to enable TOTP. Also, it’s best to copy the backup codes and store them somewhere safe
in case you don’t have TOTP at hand.
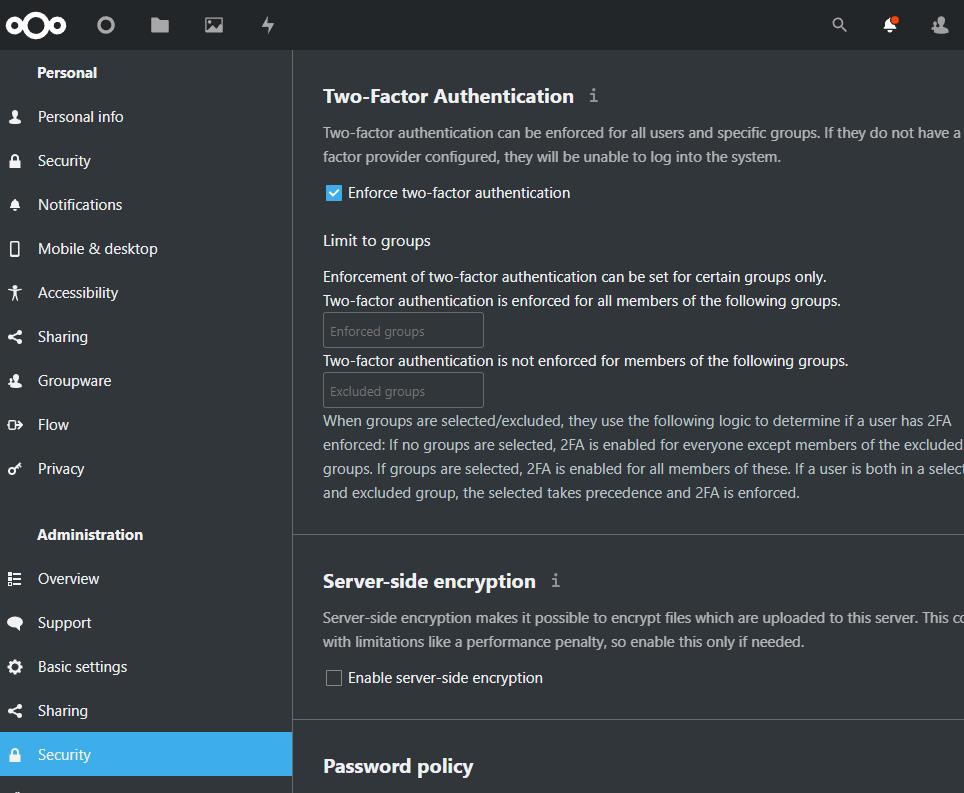
Now go to Security in the Administration section and enable Enforce two-factor authentication
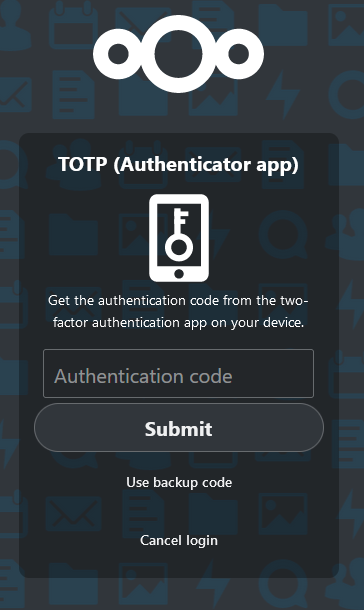
Now, after login, you would be getting a TOTP prompt like below
You can also set up login using Yubikey using this Two-Factor U2F Nextcloud App
Sync your data from Mobile
Nextcloud has apps for both Android
and iOS to sync your data from your phone.
In the entry screen, give your hostname - https://your-domain/nextcloud (If you got an error, remove /nextcloud and try).
And follow the following steps to log in. You can enable Auto upload to automatically upload the photos on your Mobile.
Interesting Apps
Nextcloud has many apps, and you can browse them here. Below are some interesting apps.
Password Management
You can install Nextcloud passwords app and store your passwords. And to access on mobile, you can install a companion app, Nextcloud Passwords for Android or Passwords for Nextcloud (iOS Client) .
Notes
You can install Notes and store your notes. And to access on mobile, you can install companion app, Nextcloud Notes for Android or notes-iOS-App
Additional storage
You can resize your VPS to include more hard disk storage if you are getting out of space. If you are using a home server, you can purchase a hard disk and use that as a storage location. If you are using a Linux home server, you need to format it to Ext4.
Accessing using WebDAV
You can mount your storage as a network volume or use rclone to manage your cloud storage.
Conclusion
Above is how you can self host your cloud storage with Nextcloud. I hope this helps. – RC


Comments